Installation of the Desktop Delivery Controller
Intro: First we need to enroll a virtual machine in VMware, what will be used as Desktop Delivery Controller
Step 1: Download the Citrix 7.12 image from the My Citrix website first
Step 2: Mount the Citrix 7.12 ISO in VMware to the specified server
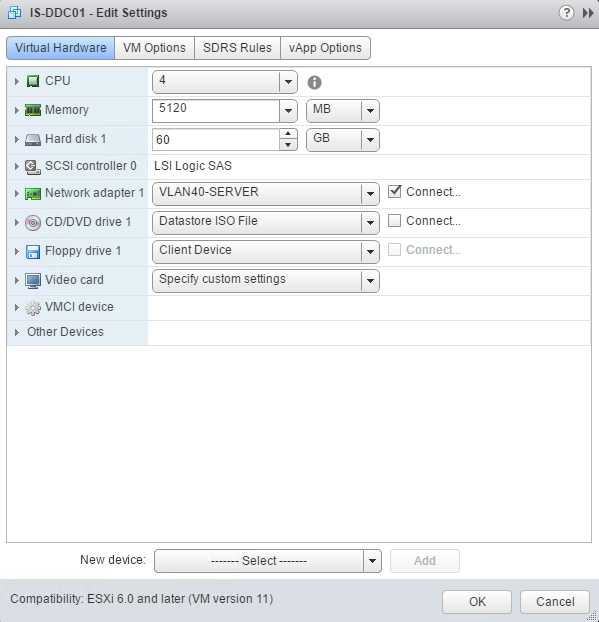
Computername: IS-DDC01
OS: Windows Server 2012 R2 Standard
Joined Domain: infrashare.net
IP: 10.0.40.60
VM Settings: 5GB RAM – 4 vCPU – 60 GB Harddisk
Other settings: Allow RDP / VMware tools applied
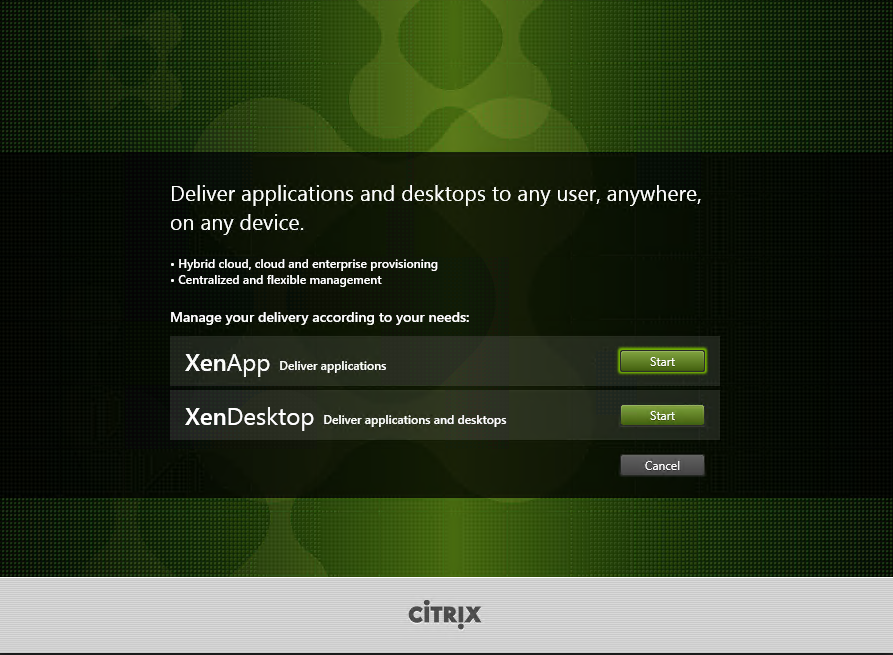
Step 3: Log on to the server and start the initial Citrix setup by running AutoSelect.exe / autorun
Step 4: Click on the Start button, next to XenApp
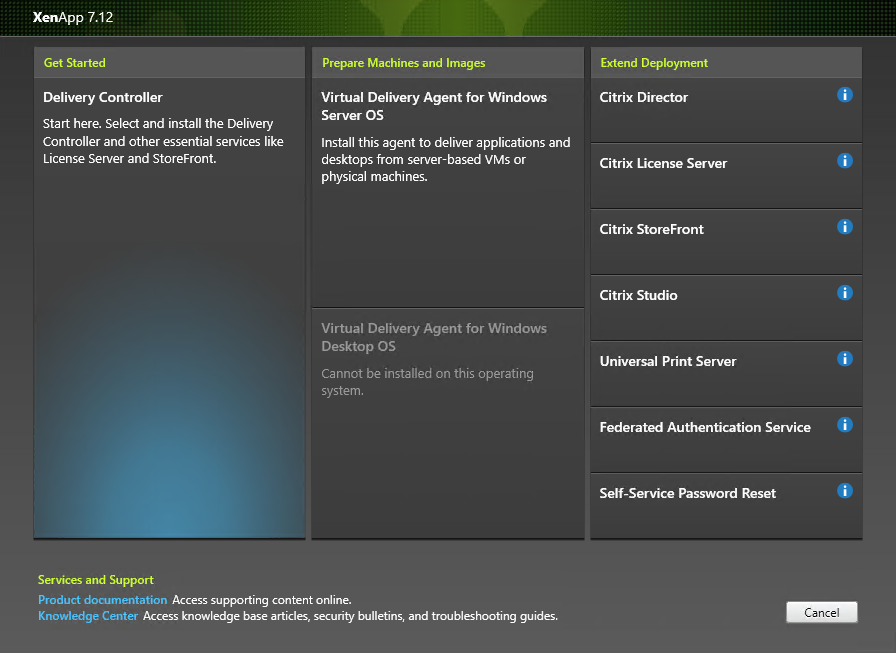
Step 5: Choose for the Get Started – Delivery Controller option
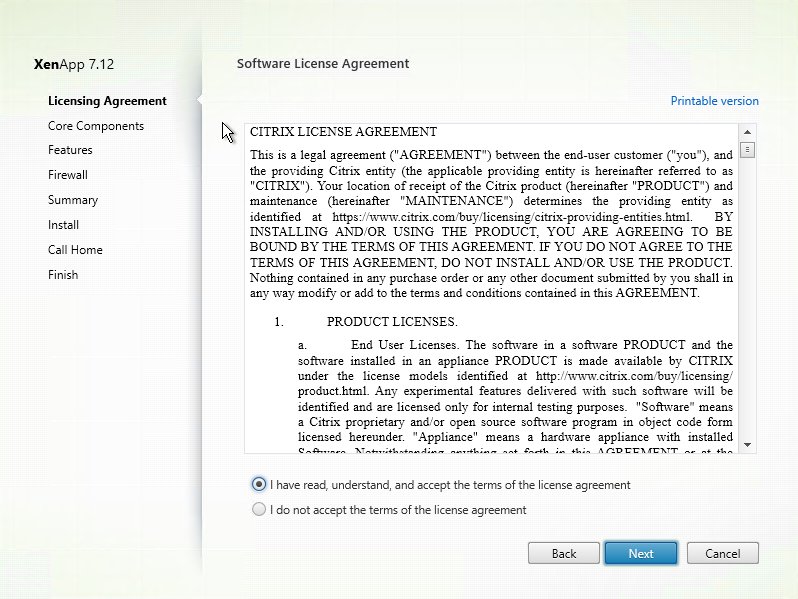
Step 6: Accept the terms and license agreement, click on Next
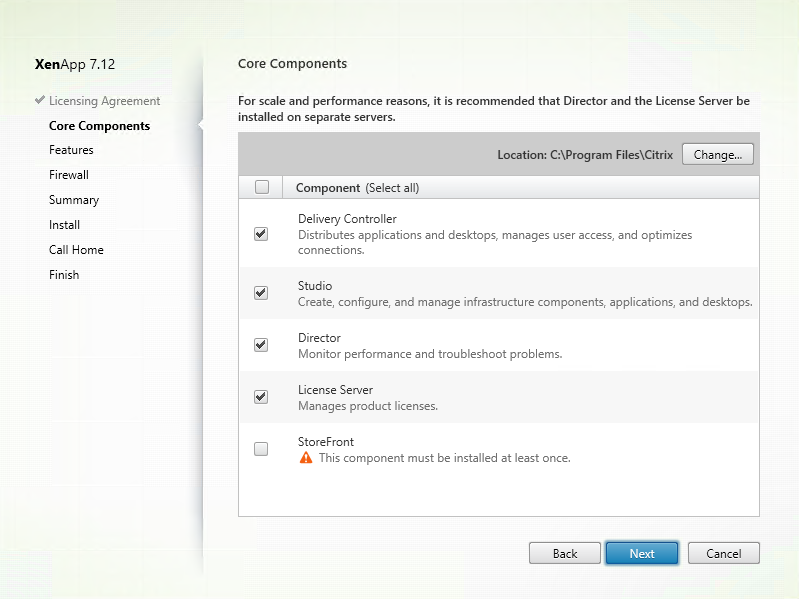
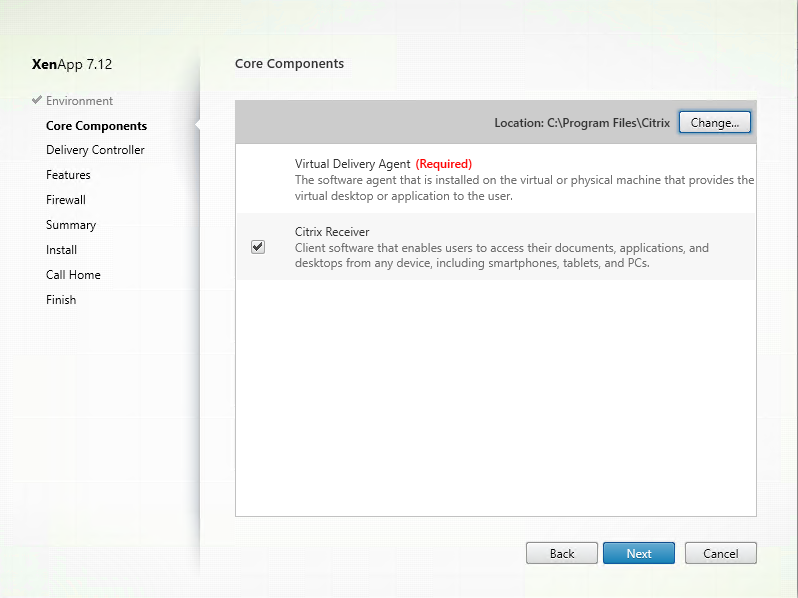
Step 7: Choose the Core Components, for this installation guide I will be using a separate StoreFront server, so I untick the checkbox and let all the others be default, click on Next
Note: If you haven’t got any StoreFront servers yet, for production environments I prefer to install this on a separate server. Please check my StoreFront blog article
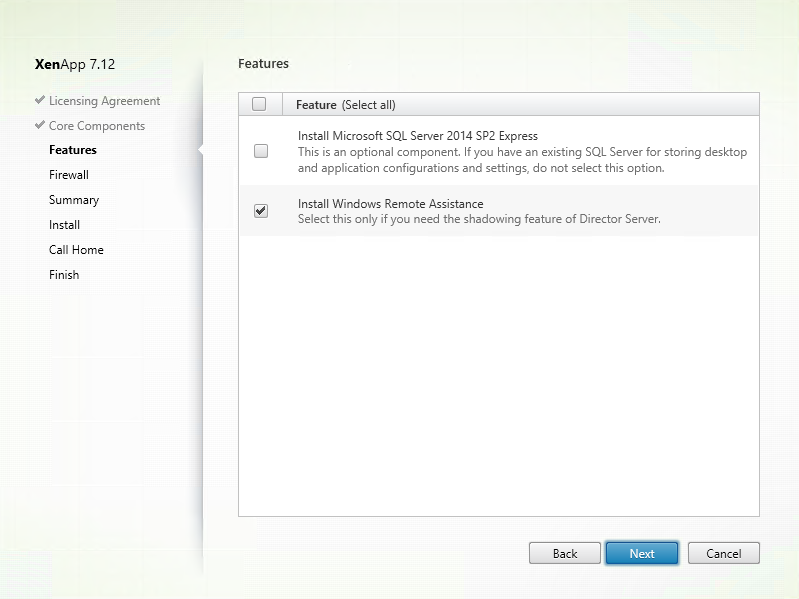
Step 8: Uncheck the – Install Microsoft SQL Server 2014 SP2 Express – We are using a Central SQL Server Database. Let the Install Windows Remote Assistance be default, this setting will be activate the shadow function in Director. Click on Next
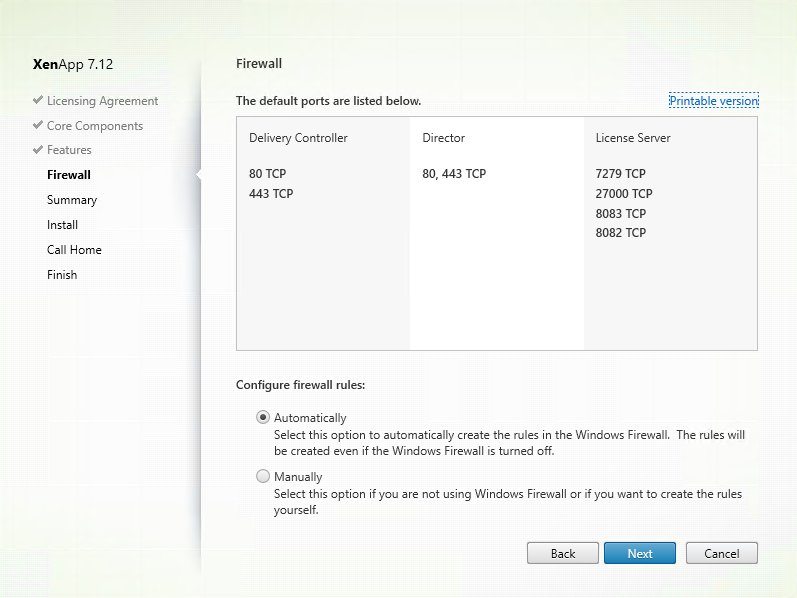
Step 9: Setup the Firewall entry’s, for this article I will let this on Automatically, click on Next
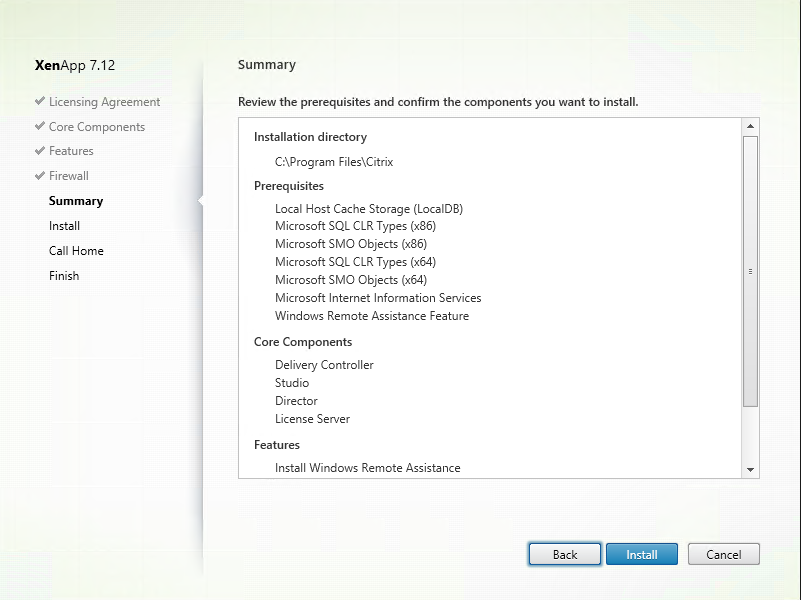
Step 10: All the configured parts will now be summarized, please check everything, if Ok, click on the Install button to start the installation process
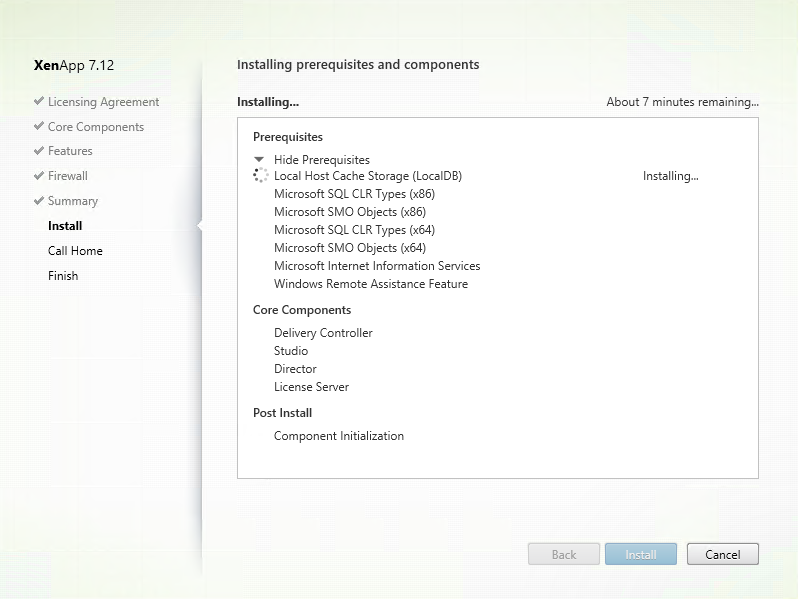
The installation process is ongoing…
Step 11: When the installation process is finished, the Call Home selection screen comes around, for this blog I choose – I Do not want to participate in Call Home – and click on Next
Step 12: The installation completion summary will be showing. The initial installation is done, click on the Finish button to start the Studio to start the configuration
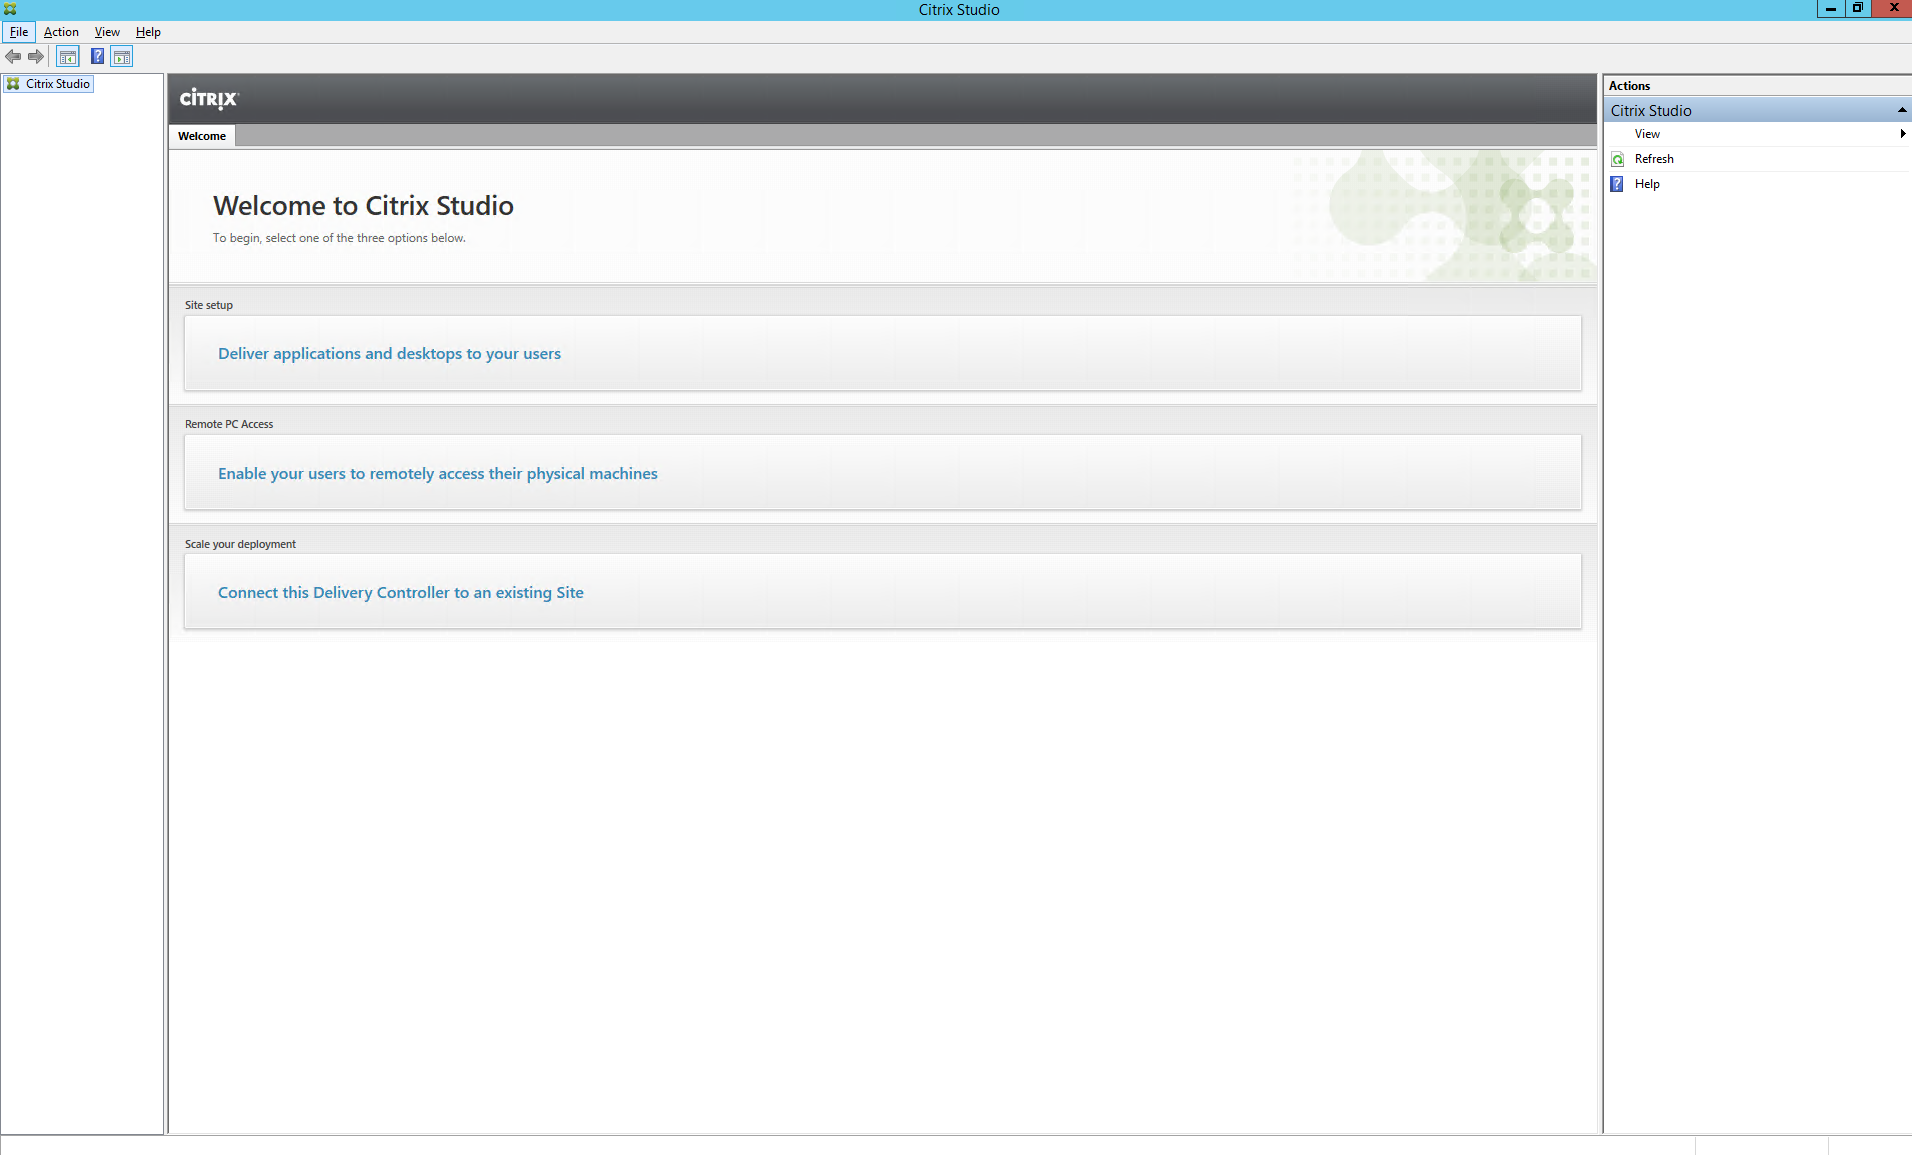
Step 13: Click on the — Deliver applications and desktops to your users — option
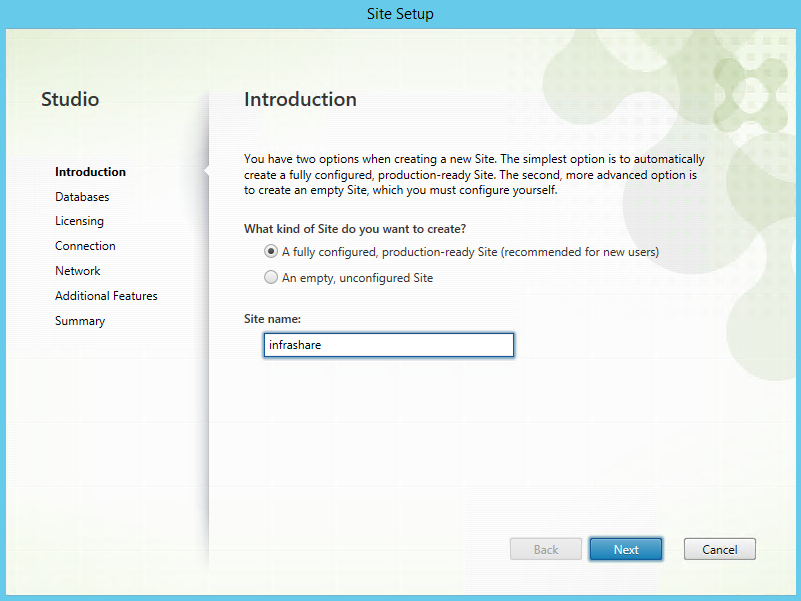
Step 14: Give in a name for your Site, this can be a random name, click on Next
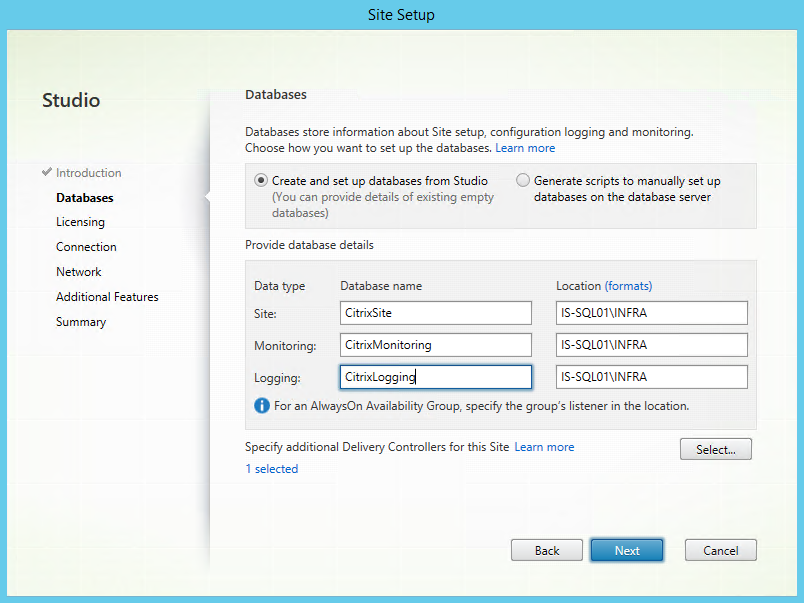
Step 15: Setup your Citrix Database, the names will be suggested automatic, with the site name in the middle. You can make this your own (I removed them). Select the Database location, named instances are supported. Click Next
Note: If you have a delegated environment, where you not have sysadmin rights, you can generate the .sql scripts for the creation by selecting – Generate scripts to manually set up databases on the database server—option. You can provide these scripts to your database admin
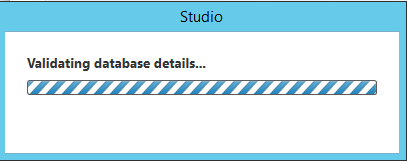
The database credentials connection is verifying…
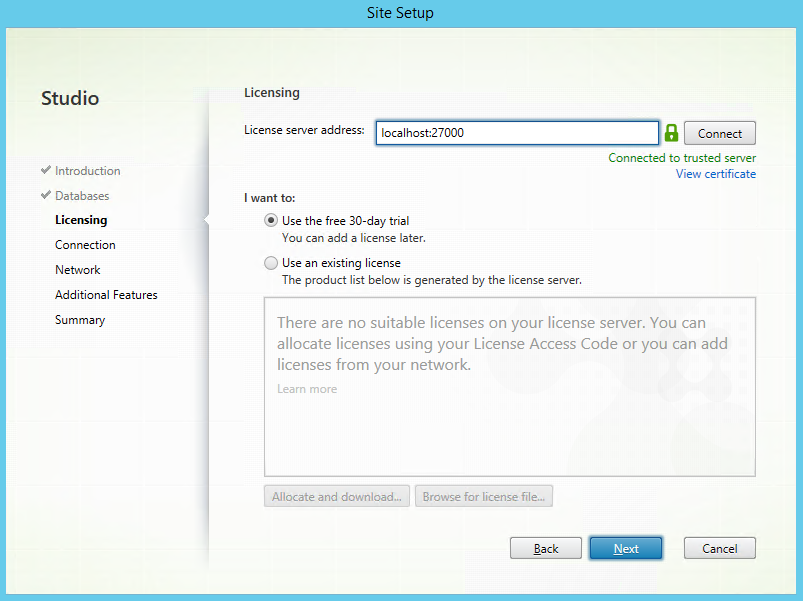
Step 16: Setup the license server address, for this article localhost:27000 will be enough, if you have a separate license file, choose for – Use an existing license – press Connect, and trust the certificate warning
Setup your VMware host Connection
Step 17: Select VMware vSphere as connection type and fill your connection information:
Connection Address: https://servername.domain.com/sdk
Username: DOMAIN\USERNAME
Password: Password
Connection name: VMware Host Connection
Note: The service account needs to have VMware user privileges to proceed the MCS preparation, if you have no administrator rights in VMware, because you need to make use of delegation, please set the following rights for the domain account in VMware vCenter->Administration; Clone template, Deploy template, Mark as virtual machine, Create snapshot, Remove Snapshot, Revert snapshot

Check out this official Citrix article for more information.
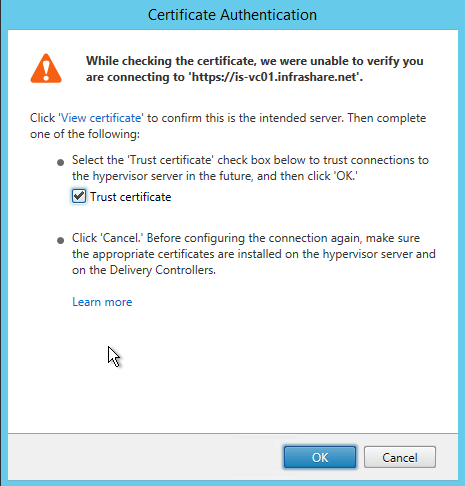
Step 18: Trust your vCenter certificate by unchecking the – Trust certificate – checkbox and click Ok
The connection in being added…

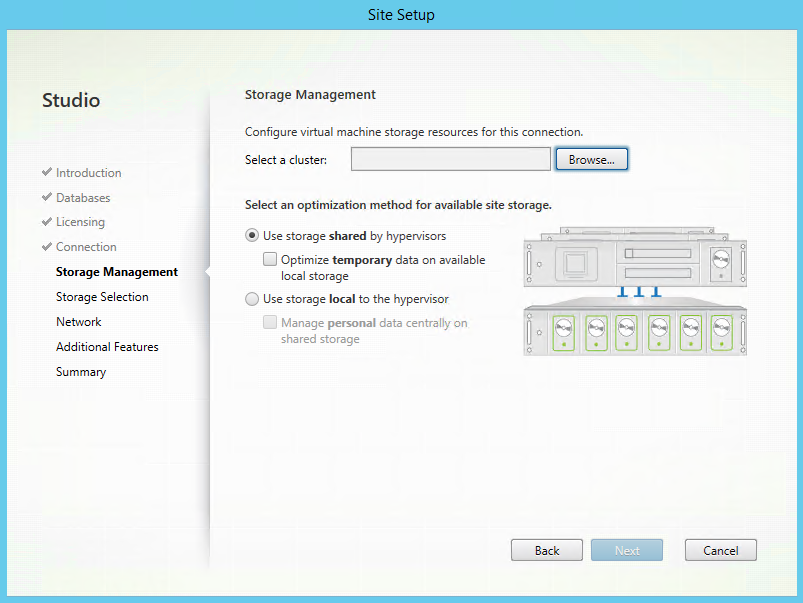
Step 19: Now you need to setup the cluster, for the host connection, click on the Browse button
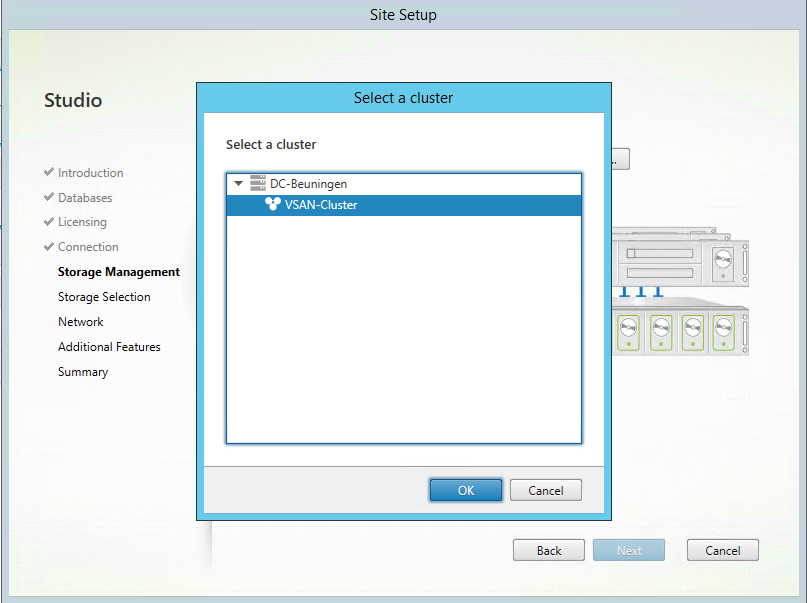
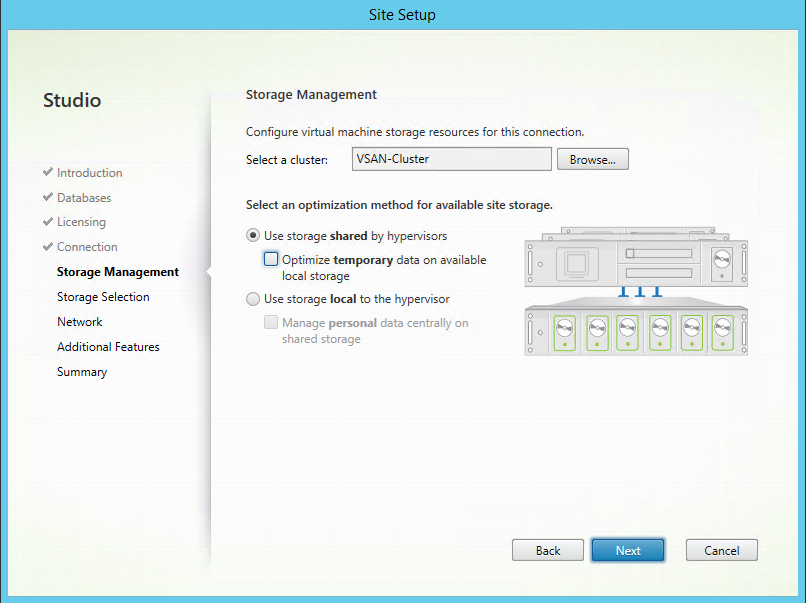
Step 20: Select your VMware cluster, for my environment this will be the VSAN Cluster. You can recognize the cluster about the next to the name. Click on Ok
Step 21: The – Select a optimization method for available site storage – can be let default on – Use Storage shared by hypervisors – click on Next
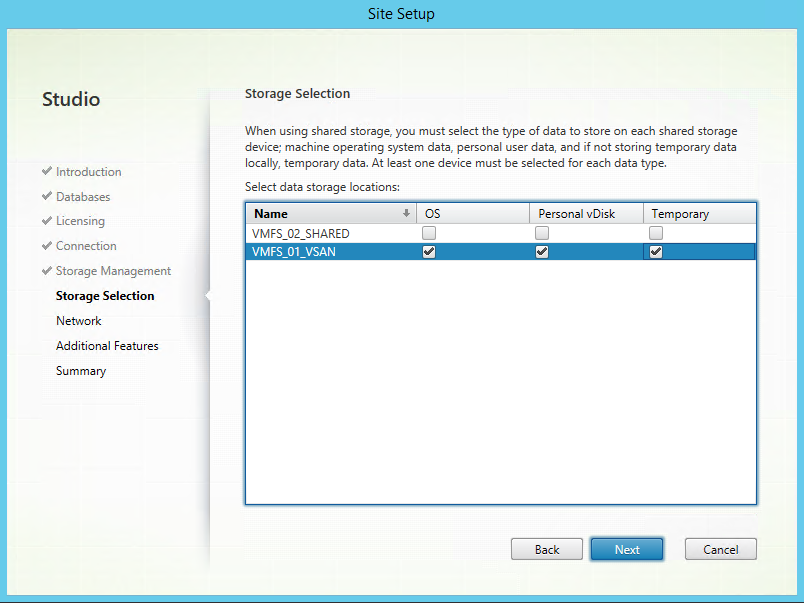
Step 22: Now we need to select the VMware datastores that you want to use for your server (MCS) deployment strategy, select all the checkmarks next to the datastore and click on Next
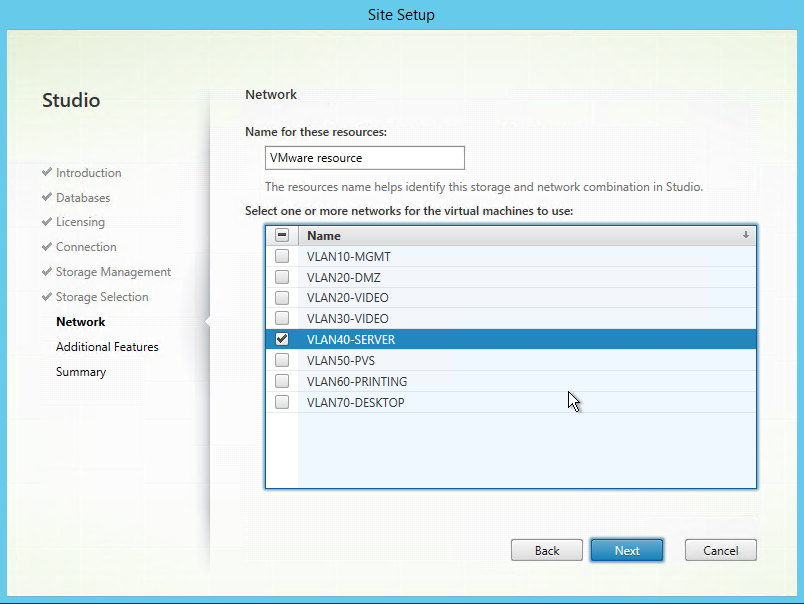
Step 23: Enter a resource name for this host connection, select the default VMware vSwitch network for the MCS deployment, click on Next
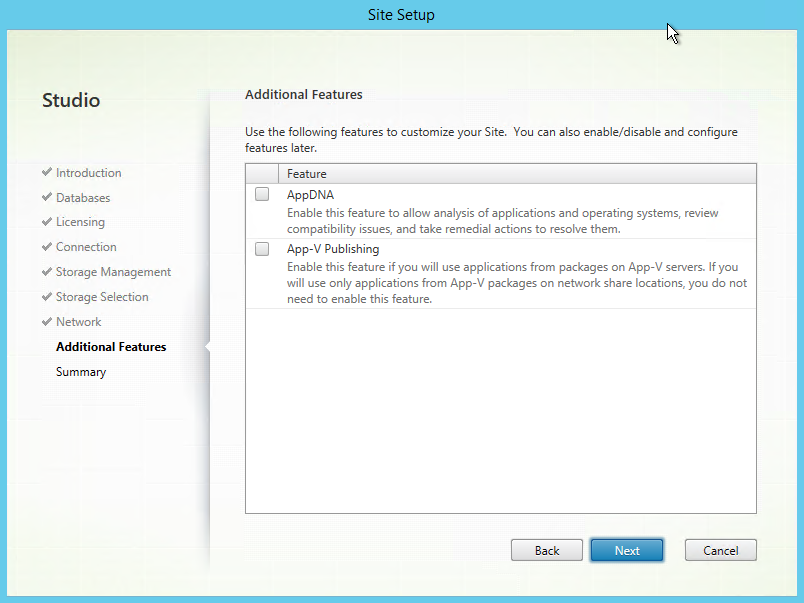
Step 24: For this article were not using one of these functions, so let them unchecked and click on Next
Step 25: The site setup summary will be showing, check all the settings, click on Finish
The Database configuration is processing…
The Site configuration is processing…
The Host Connection configuration is processing…
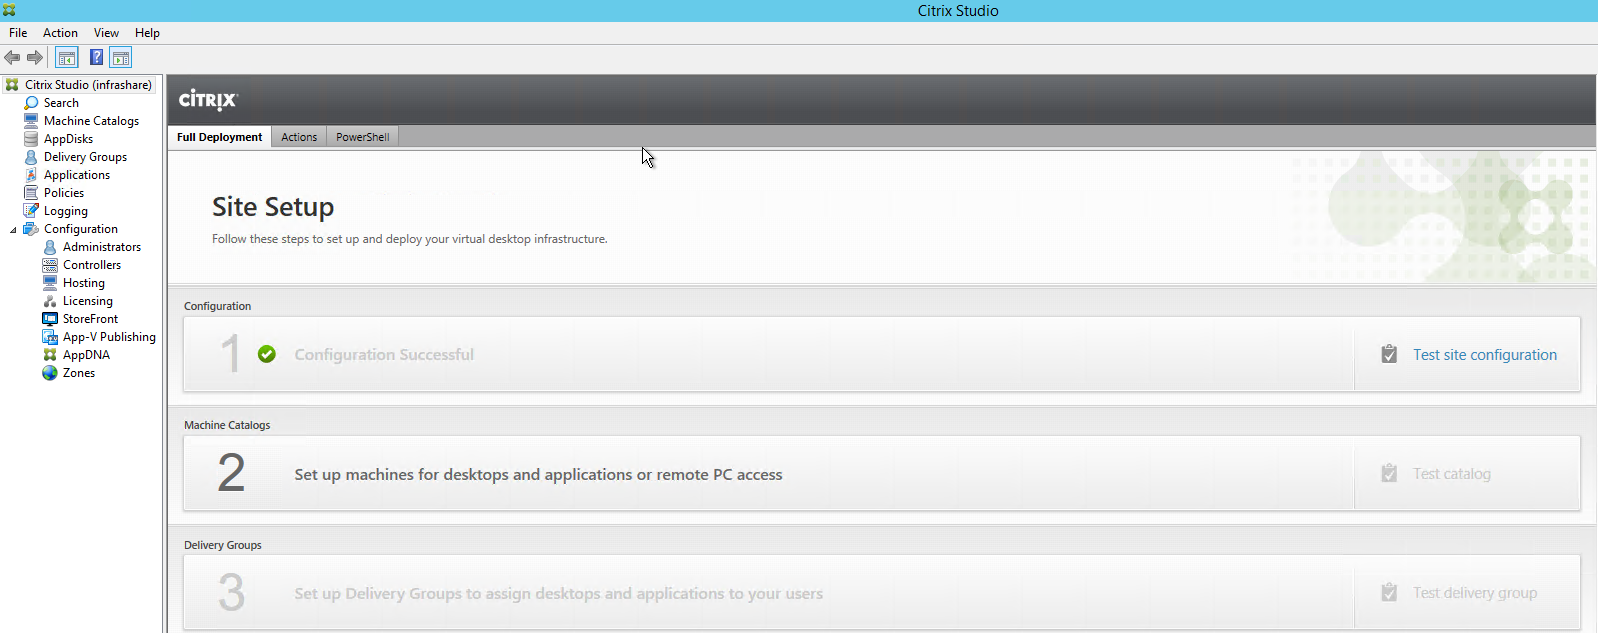
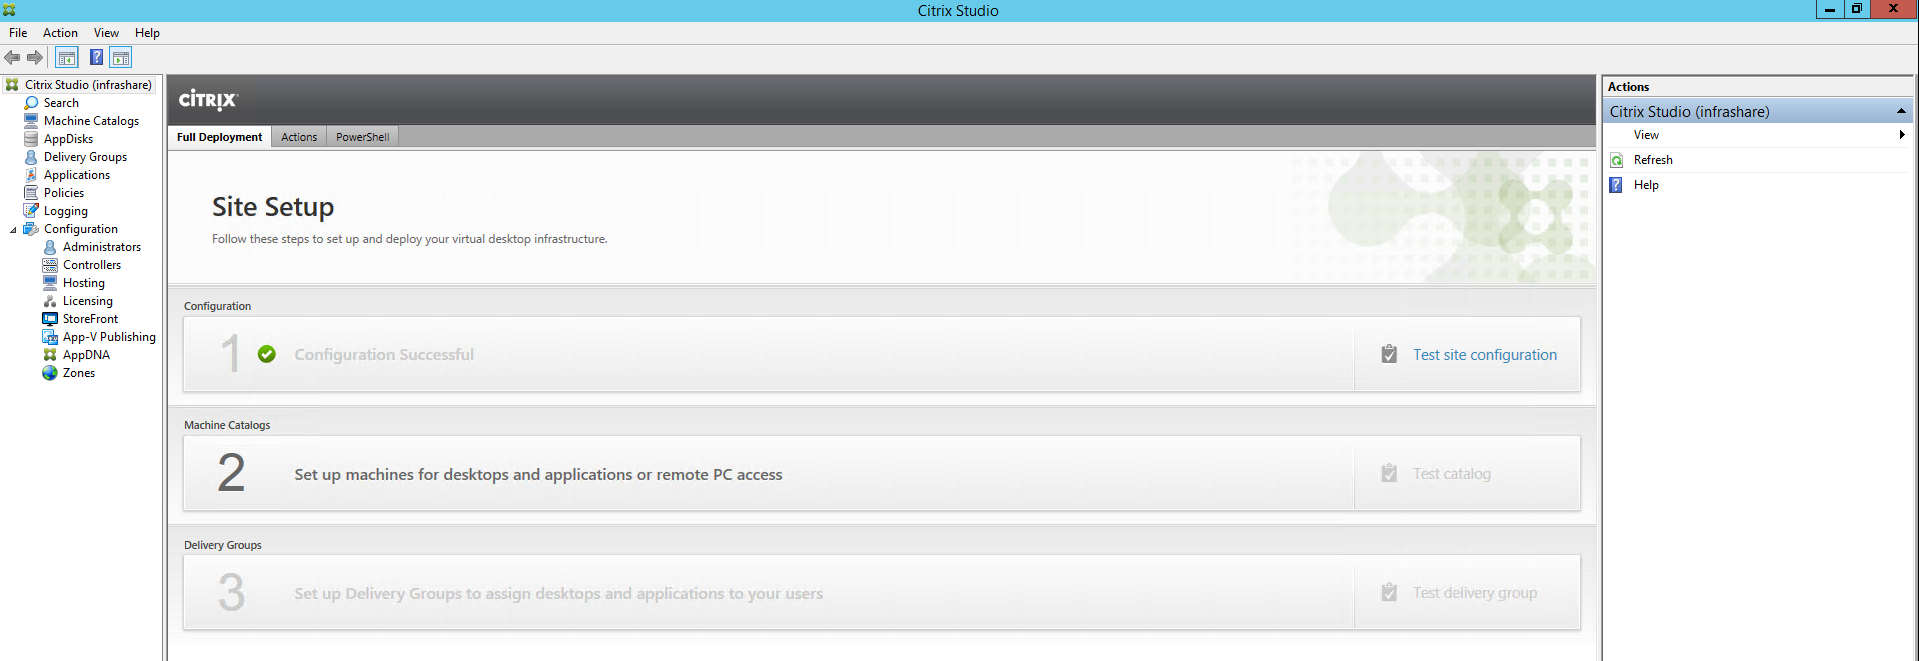
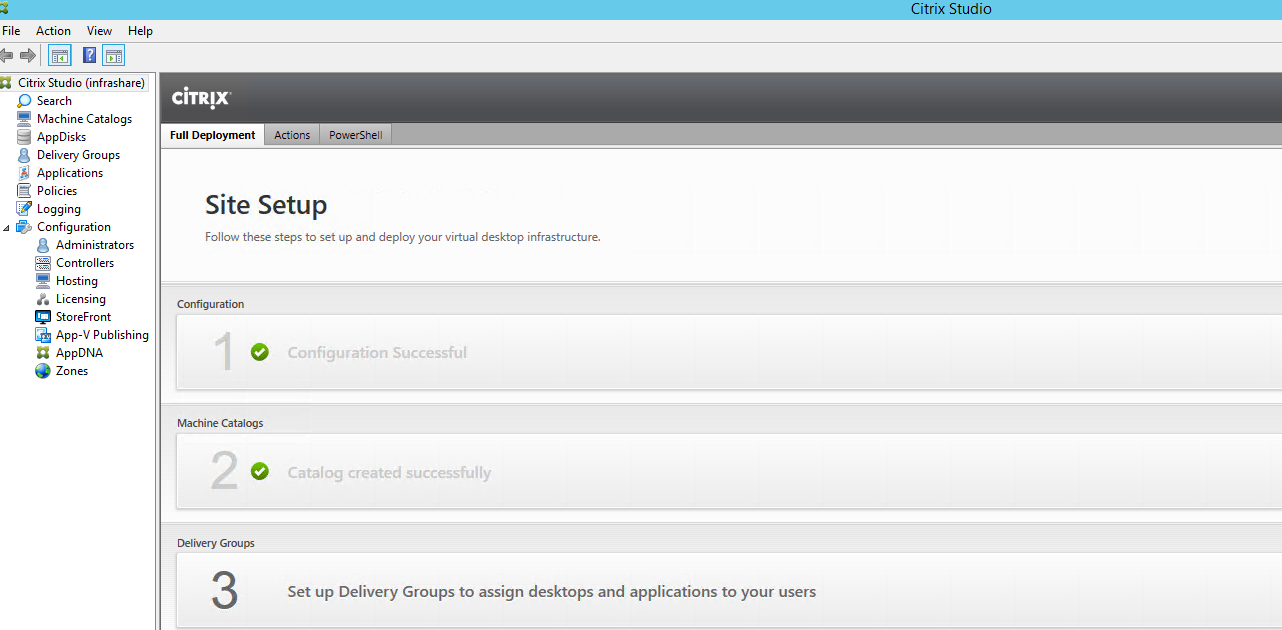
Step 26: If the configuration process run successfully, the following screen must show up. Now we need to prepare our XenApp Windows Server 2016 base image. Afterwards we are coming back to the Studio to finalizing the configuration process!
Create the new Windows Server 2016 XenApp master image
Step 26: First we need to enroll a Windows Server 2016 Virtual Machine, for proceeding the VDA Installation. I created a template in VMware earlier before. If you haven’t, just do this before go any steps further… This server will be the master/base image for the Server 2016 XenApp Machine catalog, so the computer name convention will be including the MASTER name;
Computername: IS-XA-MASTER01
OS: WindowsServer 2016 Standard
Joined Domain: infrashare.net
IP: 10.0.40.70
VM Settings: 8GB RAM – 4 vCPU – 60 GB Harddisk
Other settings: RDP / VMware tools install
Step 27: Attach the Citrix XenApp/XenDesktop ISO to the Virtual machine, Log on to the server and start the Citrix setup by running AutoSelect.exe / autorun
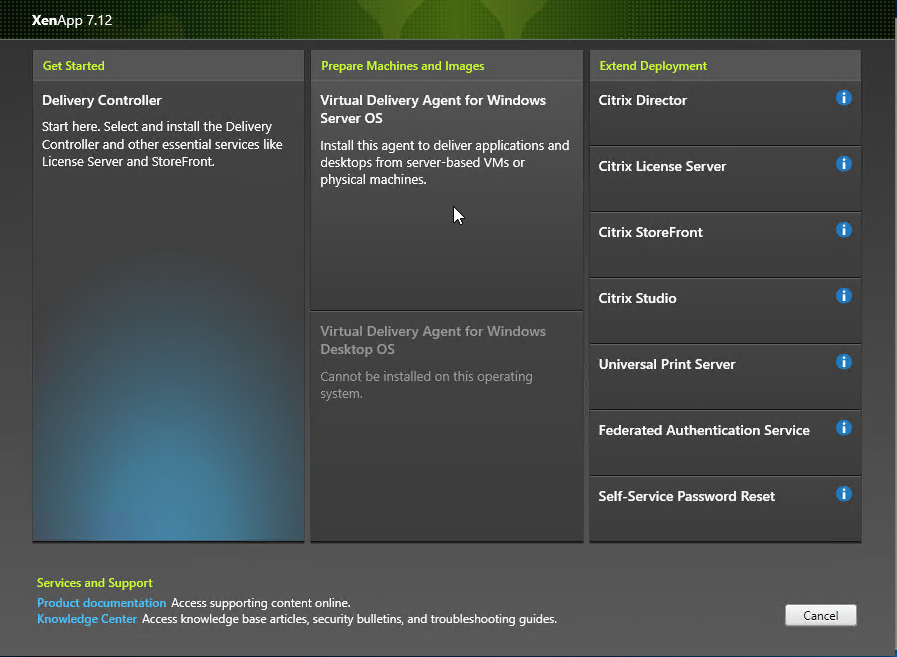
Step 28: Select XenApp, by clicking on the Start button
Step 29: Click on the — Virtual Delivery Agent for Windows Server OS – optionbutton
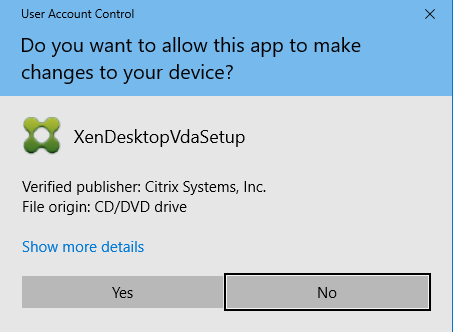
Click on Yes to start the VDA installation…
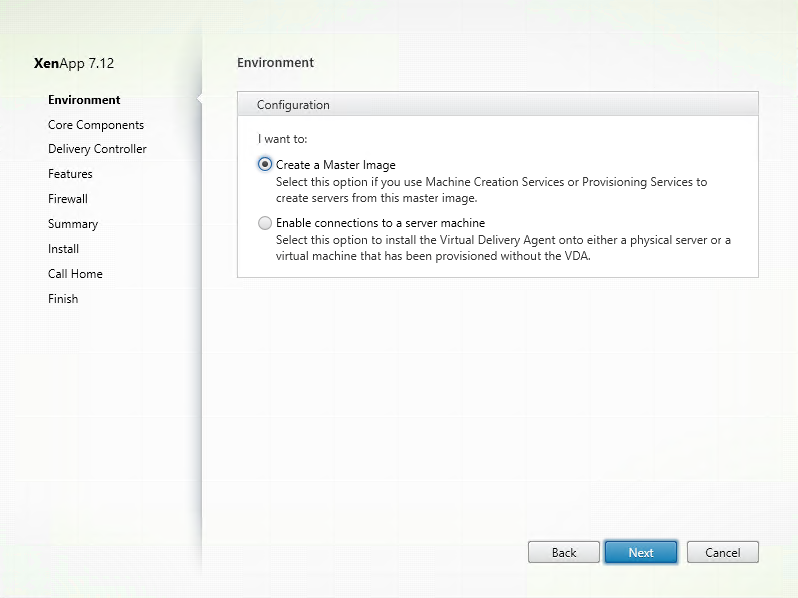
Step 30: Select the (default) option, create a Master Image, click on Next
Step 31: Let these settings be default, click Next
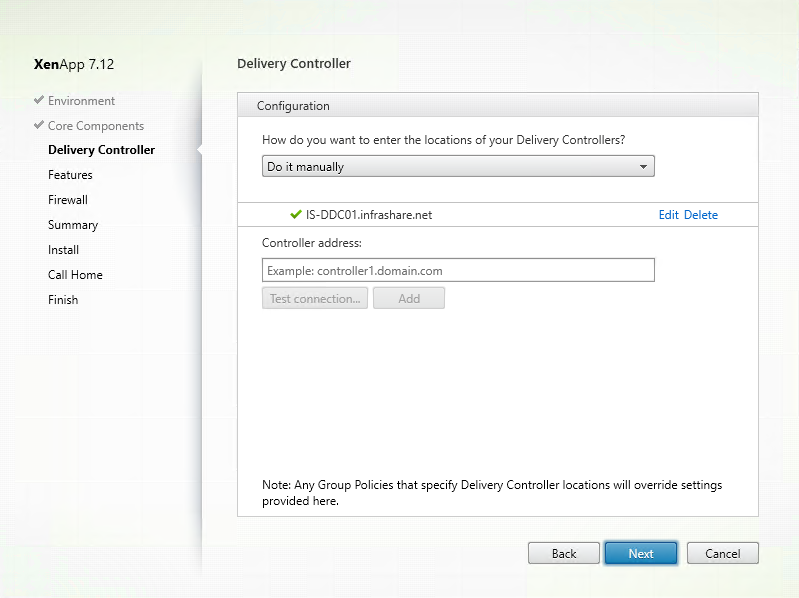
Step 32: Type in the Delivery Controllers computername, including the domain extension, click on Test Connection to verify it’s Ok, then click on the Add button, followed by Next
Step 33: Select the – Use Windows Remote Assistance – feature, otherwise the Directors shadowing user functionality won’t work. Click on Next
Step 34: For this article we are using the Windows firewall, so this can be on automatically, Click on Next
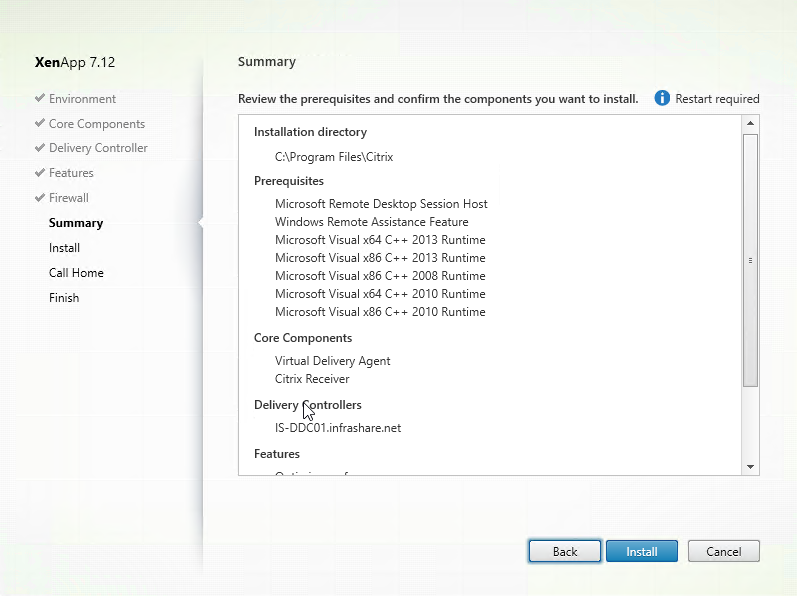
Step 35: Review the VDA installation summary, click on Install
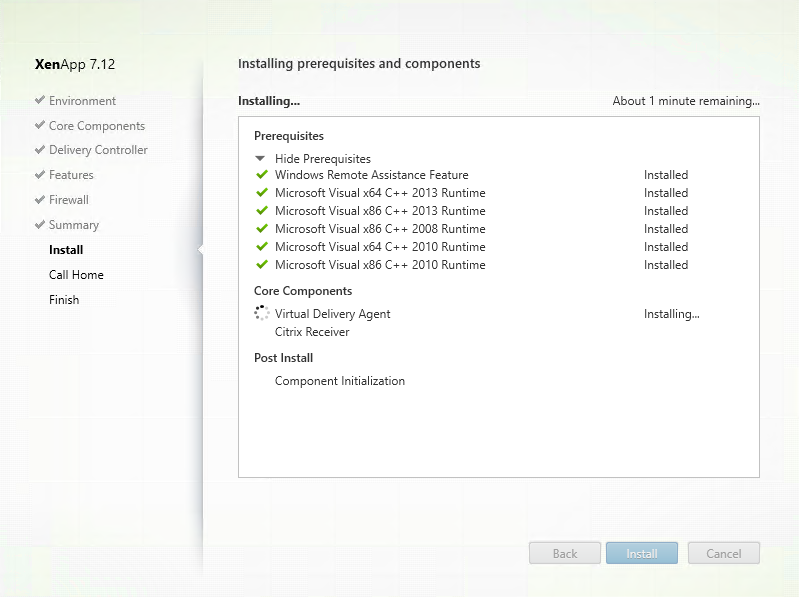
Step 36: The installation process is started, please reboot the server by clicking on the Close button
Step 37: Log back on to the server, and the installation process automatic continue the components installation
Note: If you mount the ISO through the File Explorer, you must re-mount the ISO before the installation can continue any further…
Step 37: When the VDA installation process is finished, the Call Home activation screen comes around. For this article, I choose – I do not want to participate in Call Home – but for production environments, I advise you to activate this option. Click on Next
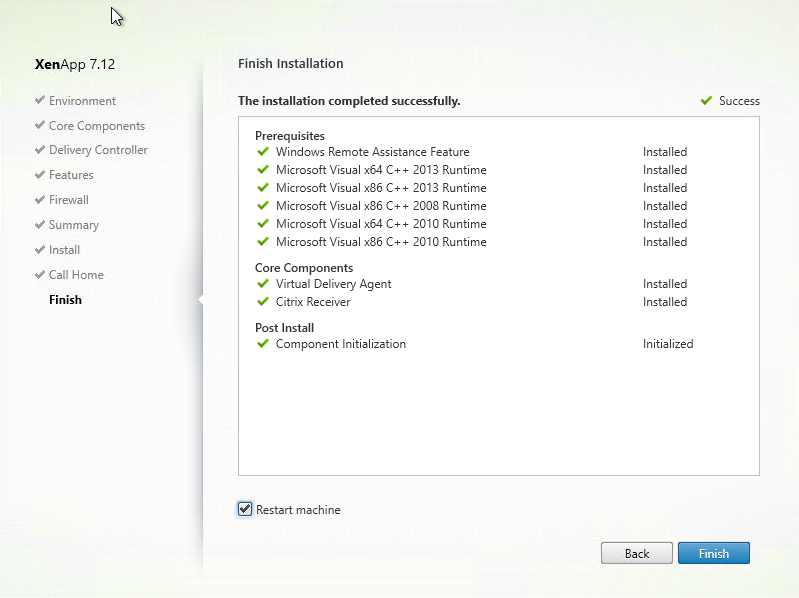
Step 38: The finished installation summary screen shows up for confirmation, if everything was installed correct, click on the Finish button to restart the machine
Setup the (MCS) Machine Catalog
Step 39: Now we need to switch back to the Citrix Studio, to proceed the Machine Catalog – Machine Creation Service configuration.
Step 40: Click on the large – 2 Set up machines for desktops and applications or remote access — button
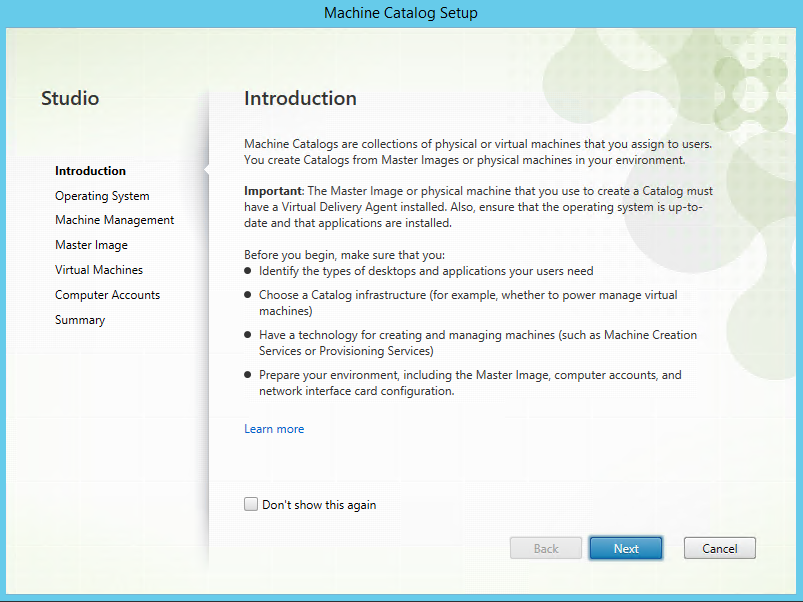
Step 41: Machine Catalog Setup screen, click Next
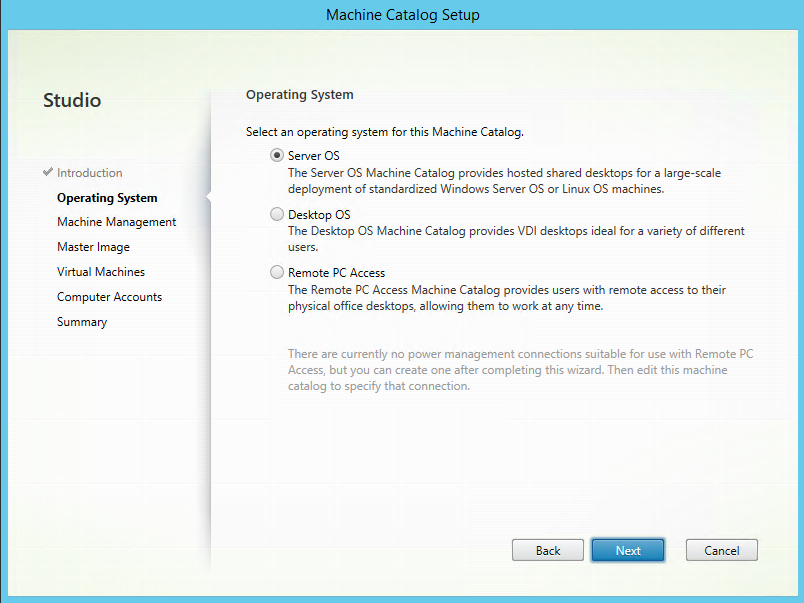
Step 42: Select the Server OS (default), click on Next
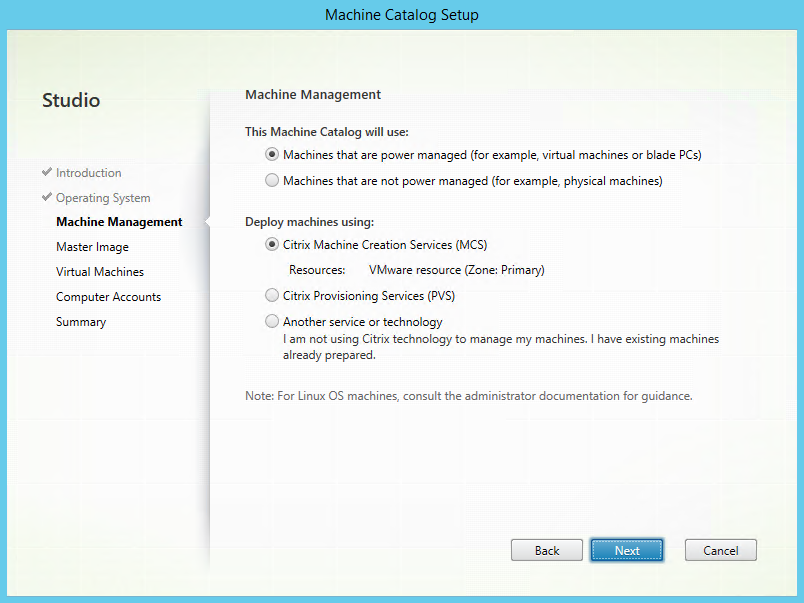
Step 43: The settings – Machines that are power managed – and – Citrix Machine Creation Services (MCS) – must be checked, click on Next
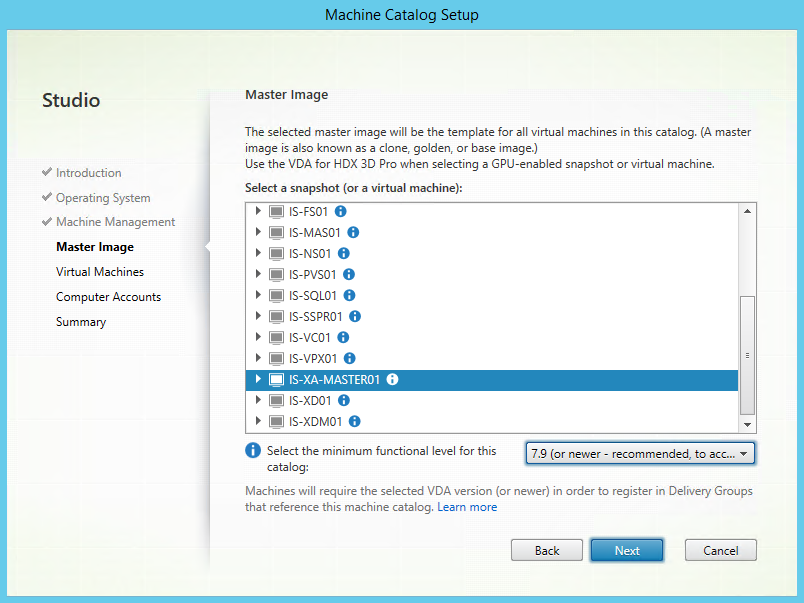
Step 44: Select the Server 2016 Master image VM, for this case this will be the IS-XA-MASTER01 server, click on Next
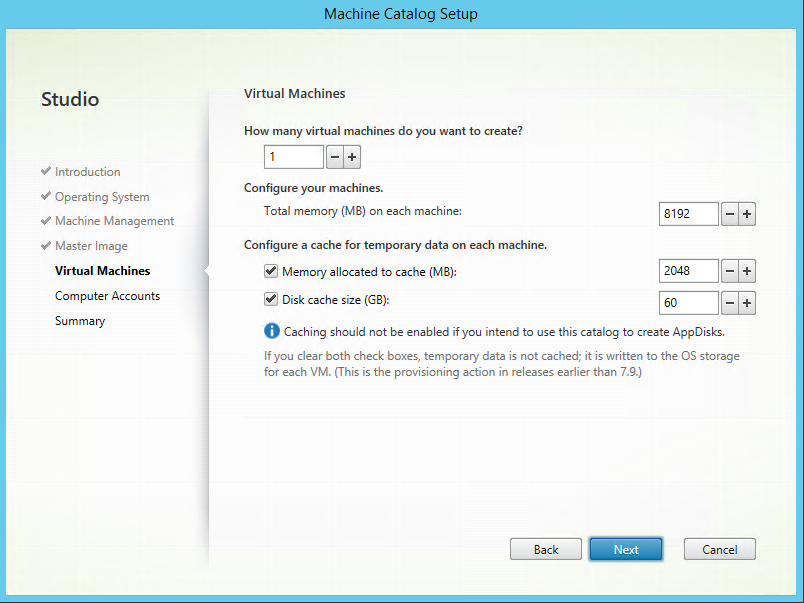
Step 45: Select how many XenApp servers you want to create, the RAM size, Cache temporary size and the size of the OS disk (differential) of the XenApp Server. For this article, I will take over the settings from the master image;
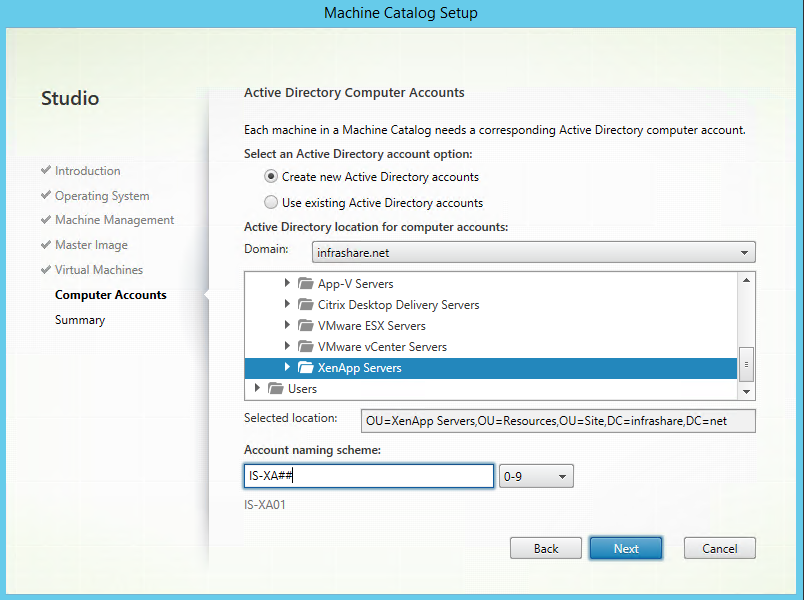
Step 46: Select a default Active Directory OU location, to place your XenApp computer accounts. Give in a XenApp naming convention, with the ## asnumbering variables. For this article i use; IS-XA as XenApp server name. The ## variable increases automatically for the numbers of XenApp servers you are creating. Click on Next
Note: If you haven’t created this OU yet, you need to start the wizard again (from step 41) afterwards to refresh the OU list.
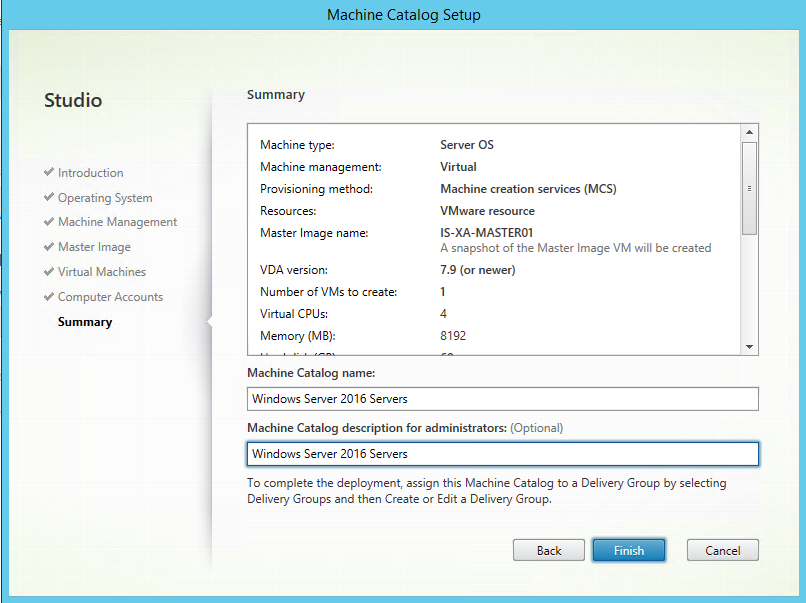
Step 47: Now we need to give in the Machine Catalog name, I suggest to name it something like; Windows Server 2016, but you are free to give in your own of course. Click on Finish
Note: After this step, we can define these machines in separate Delivery Groups per department of something equal. So there is no need to give in a department name in the Machine Catalog.
Step 48: The MCS imaging process will now be starting to create the XenApp server, based on the IS-XA-MASTER01 server we created earlier.
Catalog creation status in Citrix Studio…
The following tasks will be visible in the vCenter Recent Tasks console
Step 49: After the process is completed, there is a Base disk created on the VMware datastore. If creating an extra XenApp server, this disk is will be used as default for the creation of the server. Never delete these files, otherwise you have to re-create the complete Machine Catalog!
Setup the Delivery Group
Step 50: The Citrix Studio must be started again (must be opened automatic afterwards).
Step 51: Choose for the 3th option – Set up Delivery Groups to assign desktops and applications to your users.
Step 52: The getting started with Delivery Groups screen will be opened, click on Next
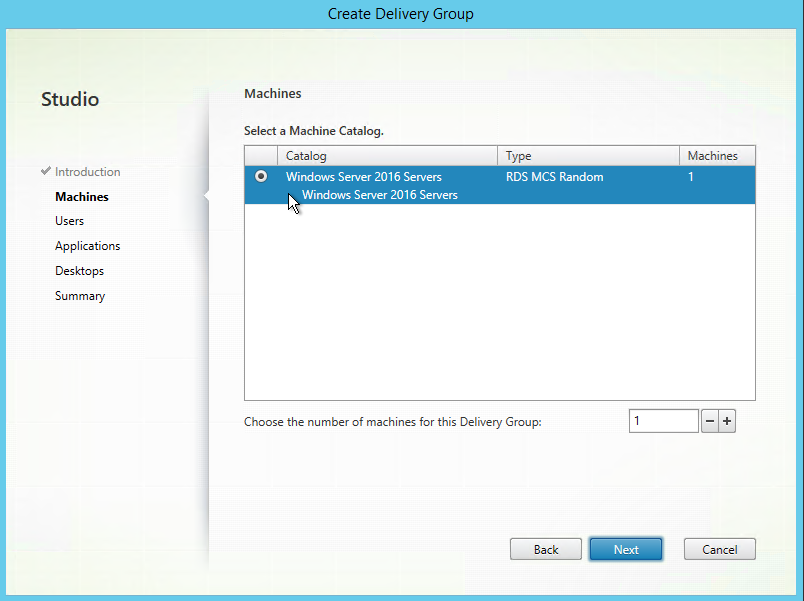
Step 53: Add the machines you just created, if you have more than one, increase the number by pressing the + button, click on Next
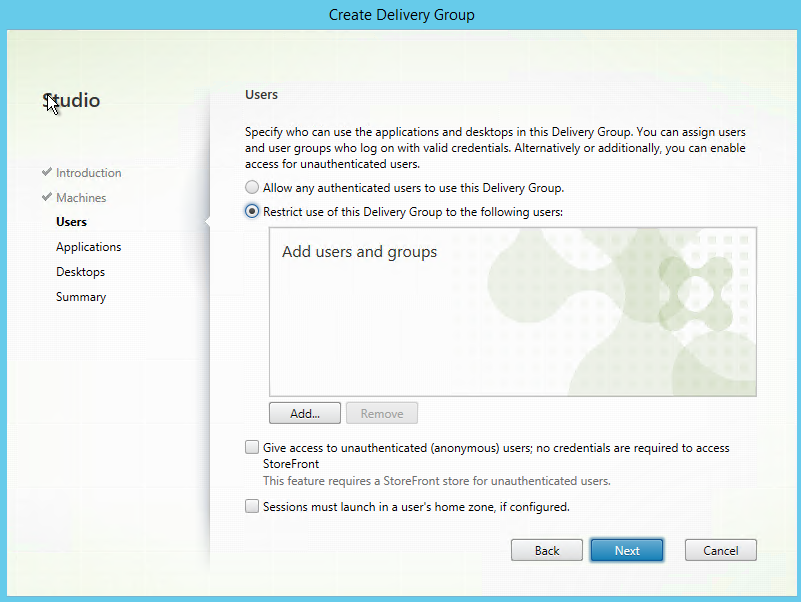
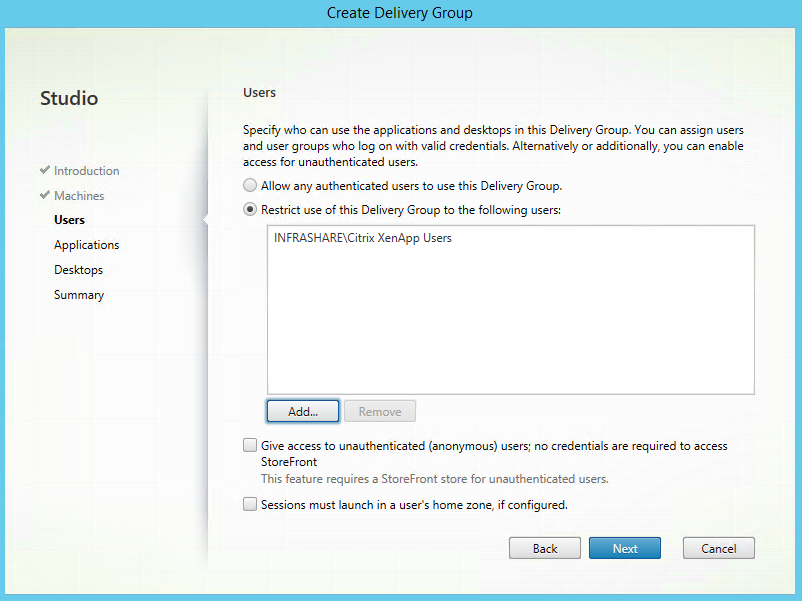
Step 54: Now we need to restrict the Delivery Group to user or a group, to do so, check the option – Restrict Use of this Delivery Group to the following users – and click on the Add button
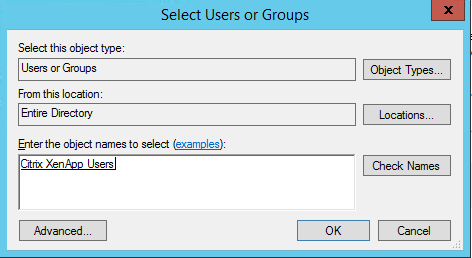
Step 55: Search for theusers or group that need to have access to the Delivery Group. I created the — Citrix XenApp Users – Security Group already in Active Directory. So type in the Security Group name and press Check Names, followed by the Ok Button
Step 56: The security group is now listed in the Users field, click Next
Step 57: We can now add application that must be published trough StoreFront. For this article, I will add calculator (calc.exe) as Published Application.
Note: If the list of Menu Start Apps is empty, the XenApp server has probably turned-off. Start the XenApp server and try it again!
Step 58: Select the Application you want to publish, for me that will be Calculator, click Ok when finish
Step 59: The Applications are now listed in the Applications field. If you want to Group applications by name/folder, you can use the – Place the new application in folder — option for that. Afterwards the applications with the same folder name will be listed in group view in StoreFront. Click on Next

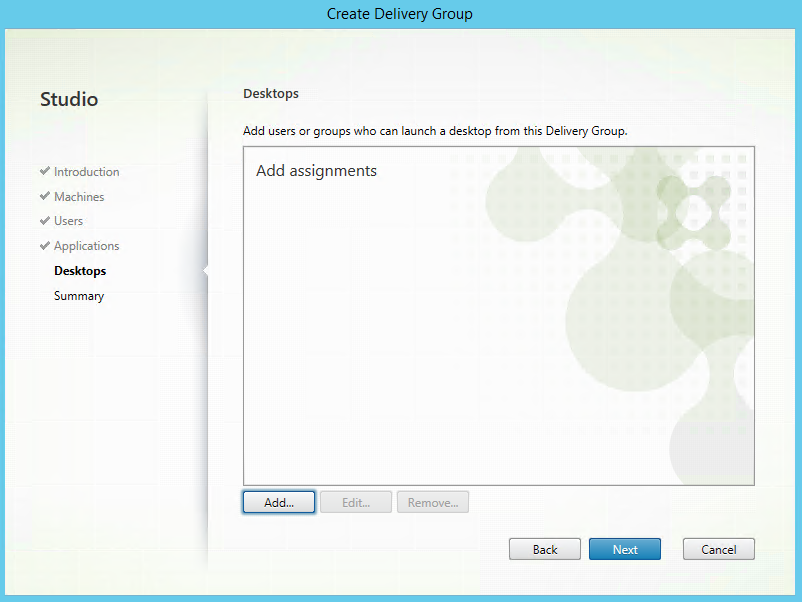
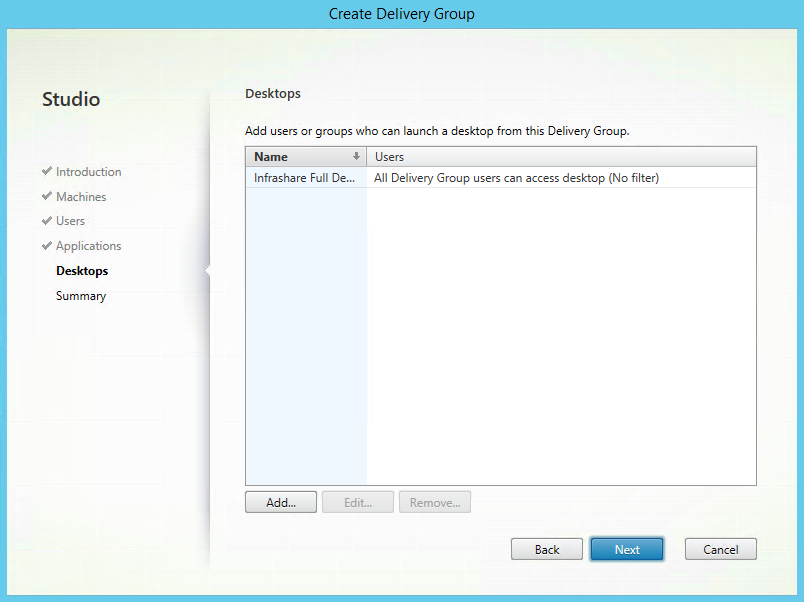
Step 59: Now we need to configure the Desktop (the RDSH part) function, to activate this option, click on the Add button
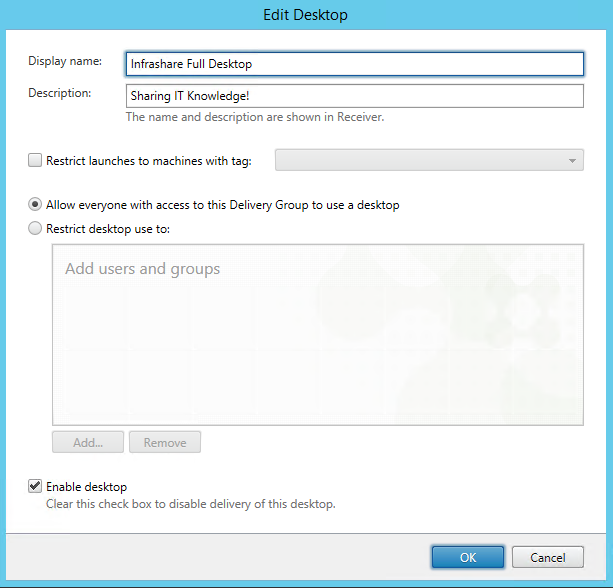
Step 59: Give in a Displayname, description and configure the security layer for giving user the privilege to logon. For this article I will use one Security Group for Published Applications and Desktop Access, so I select the – Allow everyone with access to this Delivery Group to use a desktop – option. All the users in the Citrix XenApp Users group will get access to the new XenApp Full Desktop, click on Ok
Displayname: The name of the desktop that users see in StoreFront as desktop name
Description name: The textbox that is being showed while you hold the mouse upon the Desktop icon in StoreFront
Note: If you want to separate the Delivery Group in 2 parts, so the Applications and Desktop users will not be privileged to do both, please restrict this by using the — Restrict desktop use to option and give in another Security Group or user(s)
New feature: A new feature of Citrix 7.12 is the Restricted launches to machines with tag option. Here you can specify dedicated machines to this Desktop, that have a tag on their machine.

Step 59: The Desktop will be added to the Desktop field, click on Next
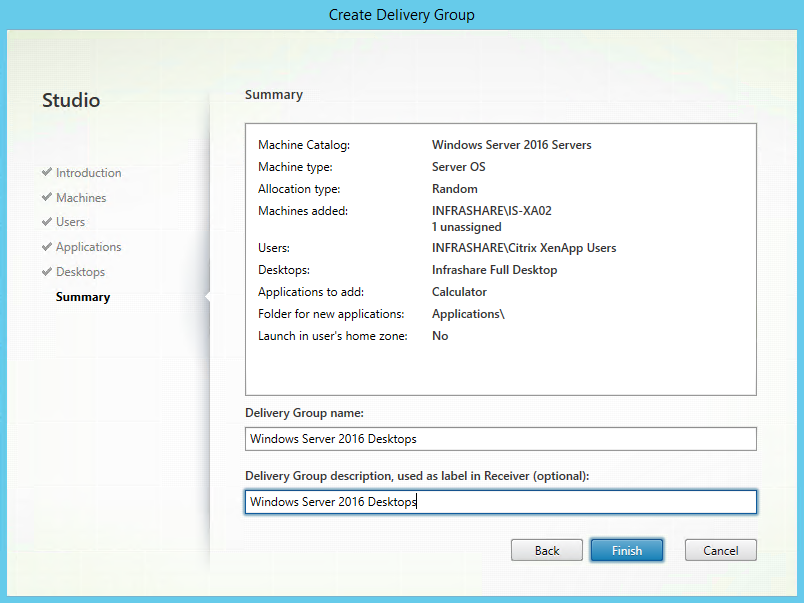
Step 60: Give in the name for the Delivery Group, I will be using – Windows Server 2016 Desktops – but you can make this your own of course! Click on the Finish button
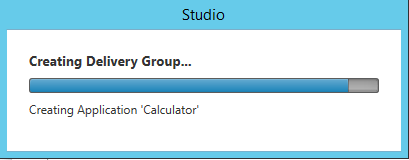
The Delivery Group is created, and the Applications are added…
Configure StoreFront
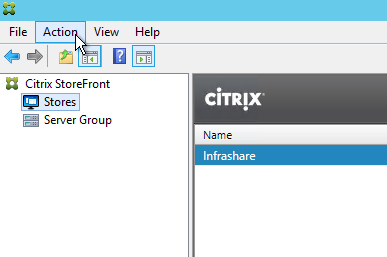
Step 61: Open the StoreFront Console and go to Stores
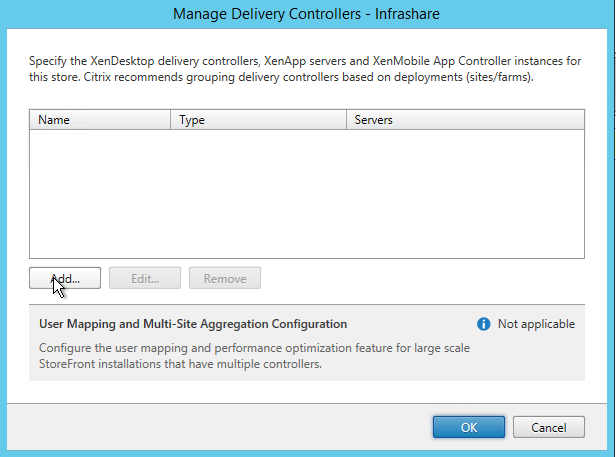
Step 62: Click on the – Manage Delivery Controllers – option to Add the new Desktop Delivery Controller
Step 63: Click on the Add button
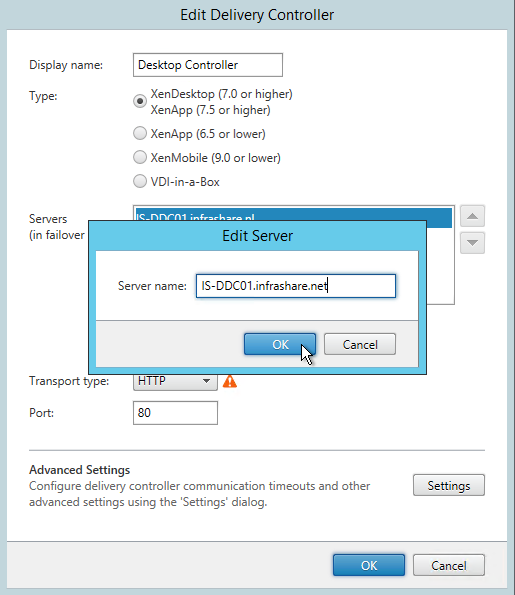
Step 64: Fill in a Displayname for your Delivery Controller, uncheck the – Servers are load balanced – option, select HTTP as transport type and click on Add
Step 65: Add the new Desktop Delivery Controllersserver address and click on Ok and in the nest 2 screens also again the Ok button. The StoreFront setup is now done correctly
Activate Local Host Cache
Step 66: To activate the new LHC feature, log on to the Desktop Delivery Controller and start a PowerShell ISE console
Step 67: Run the following command to load in the Citrix PowerShell snap-ins
1
asnp citrix.*
Step 68: Enable Local Host Cache, run the following PowerShell command:
Note: This cmdlet also disables the connection leasing feature. Do not enable both Local Host Cache and connection leasing.
1
Set-BrokerSite -LocalHostCacheEnabled $true -ConnectionLeasingEnabled $false
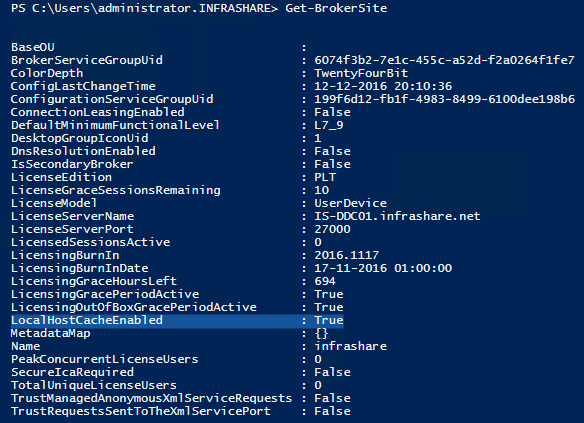
Step 69: You can check if the setting is activated correct, by running the following PowerShell command:
1
Get-BrokerSite
Note: Check that the LocalHostCacheEnabled property is set to True, and if the ConnectionLeasingEnabled property is set to False.
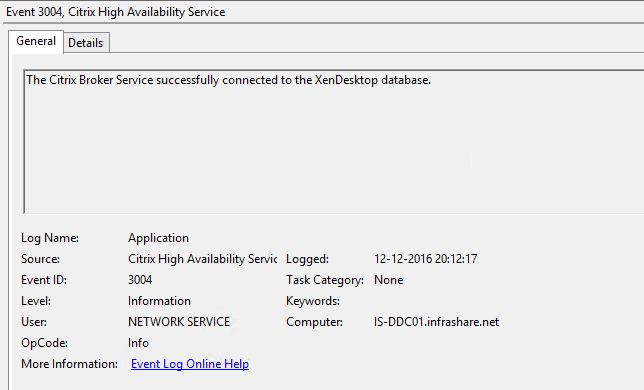
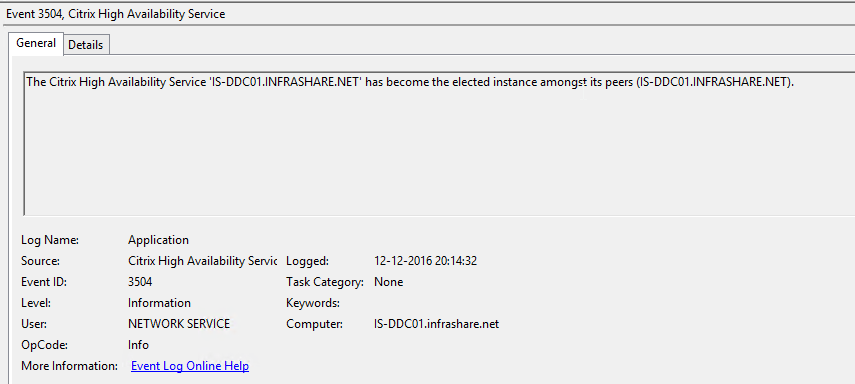
Step 70: To verify the activation, open the event viewer (eventvwr.msc) on the Desktop Delivery Controller, and check the Application log entry’s of the Citrix High Availability Service;
Configure HDX (High User Experience) Citrix Policy
For the best end-user experience with the XenApp Desktop, Citrix is providing a default HDX policy. The next steps will show you how you can use this template for your Citrix environment, filtered based on a Delivery Group.
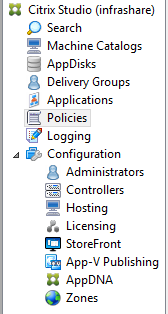
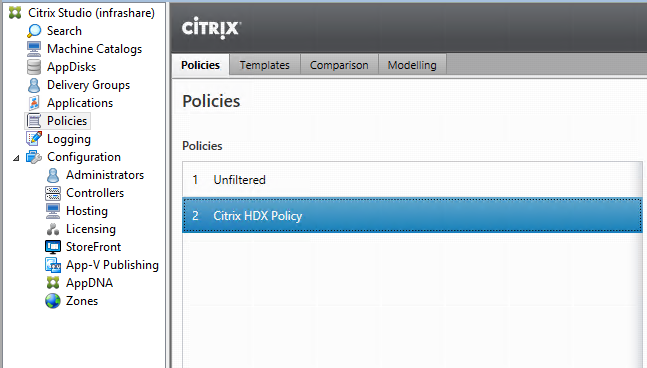
Step 71: Click on the Policies option in the Citrix Studio
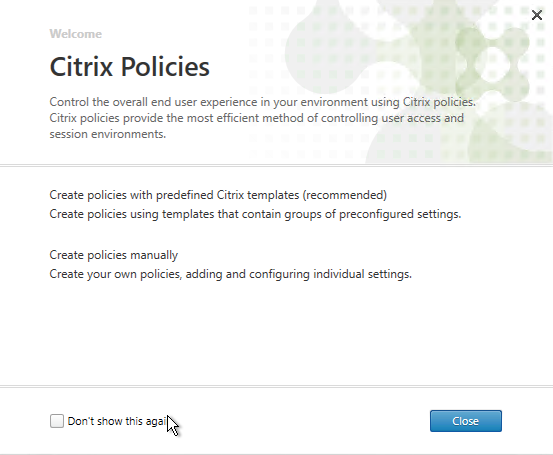
Step 72: Click on Close
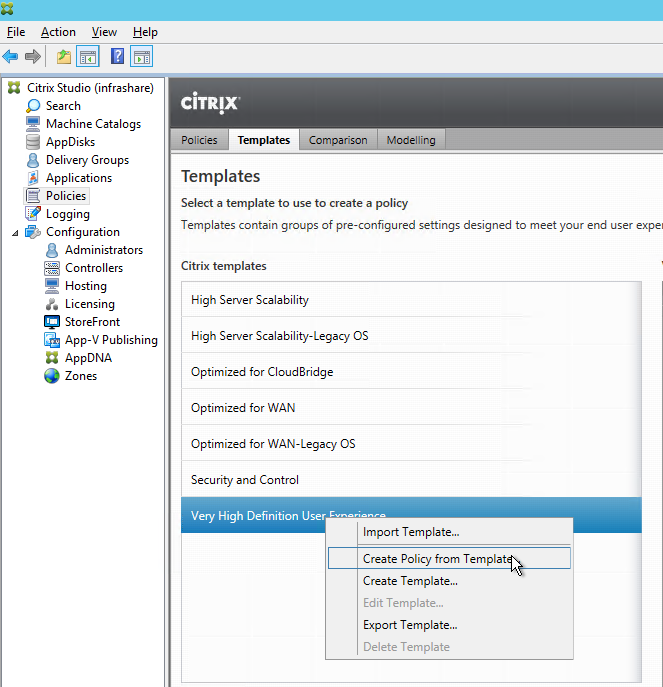
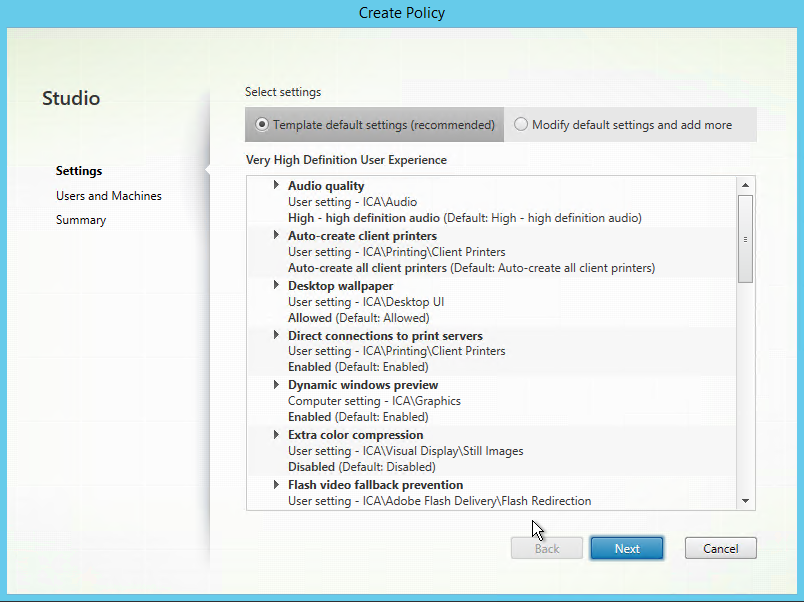
Step 73: Click on the Template Tab, right click on the — Very High Definition User Experience – template, choose for – Create Policy for Template
Step 74: Click Next
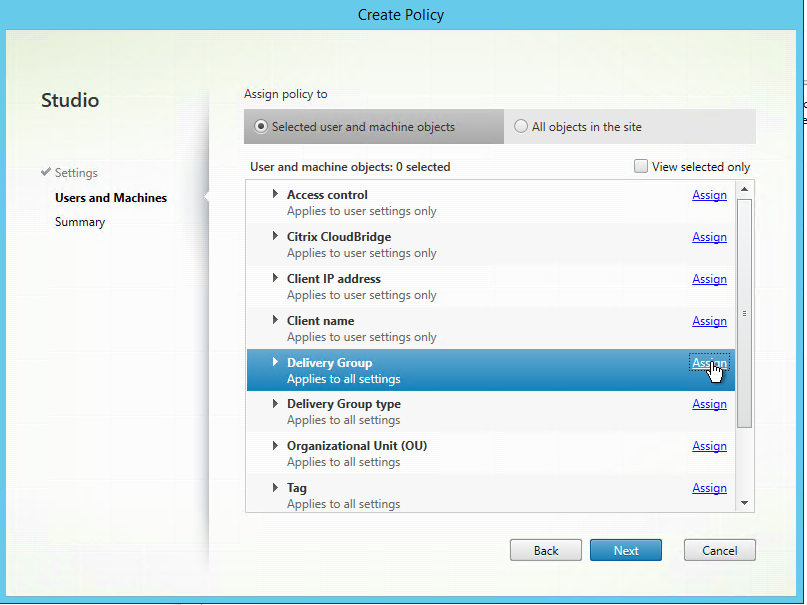
Step 75: For this article, I will be filtering this policy by Delivery Group, to do so, click on the Assign option next to Delivery Group
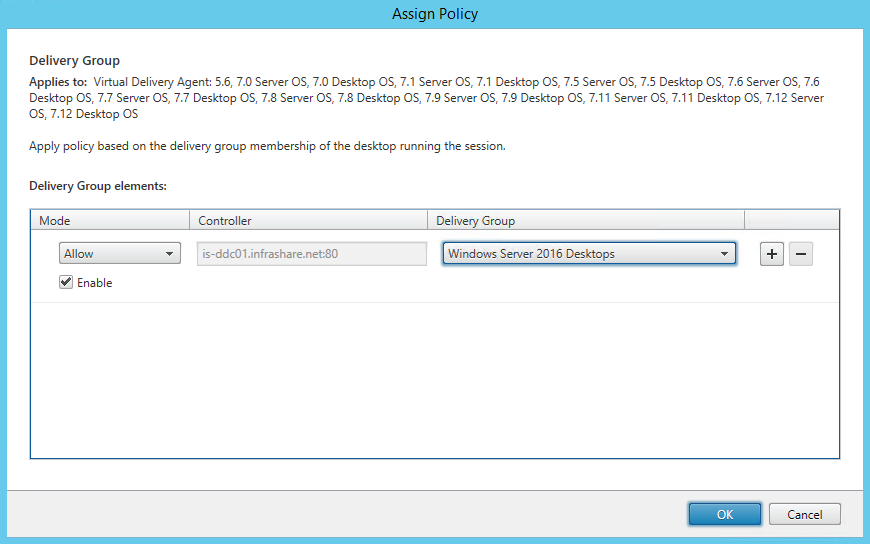
Step 76: Select the Delivery Group – Windows Server 2016 Desktops – and click Ok
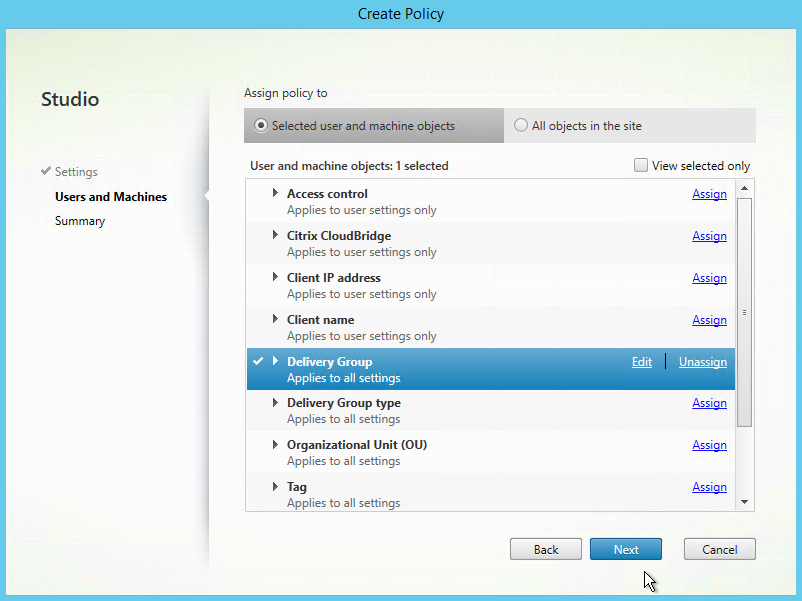
Step 77: The Edit | Unassign option is visible now, click on Next
Step 78: Type in a Policy name like – Citrix HDX Policy – Verify the Delivery Group filtering and click on Finish
Step 79: The newly created policy is now listed in the policy screen
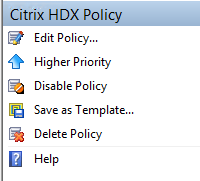
Step 80: To set the new policy as number one, you must select the HDX Policy and press the Higher Priority button
Test the environment setup
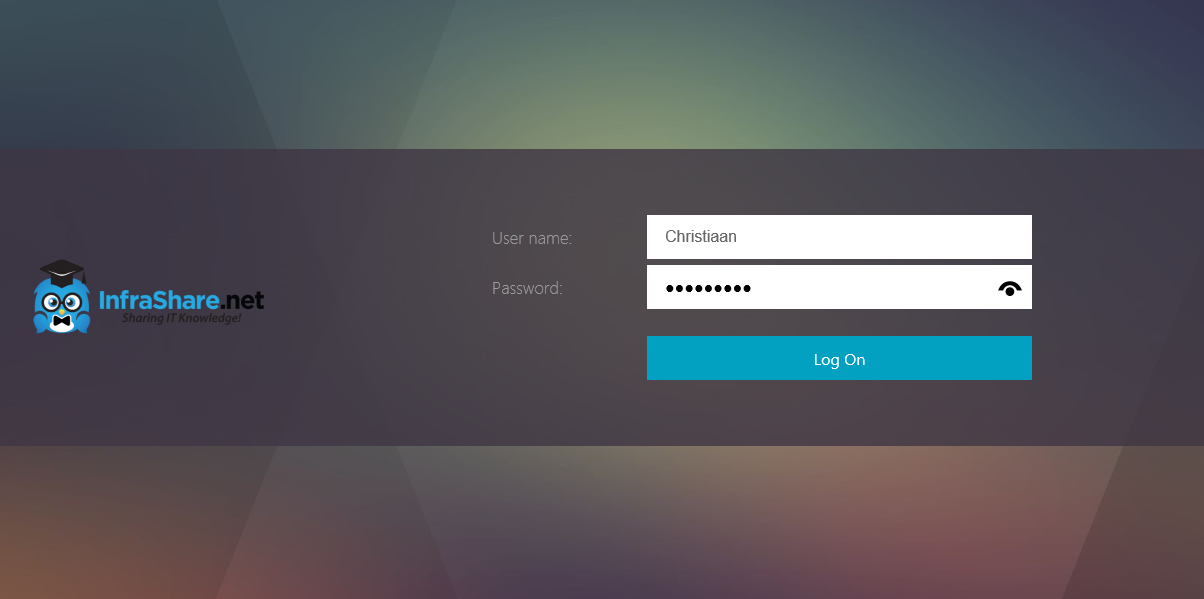
Step 81: Browse to your StoreFront page, and logon with your user credentials that are placed in the earlier defined Delivery Group – Security Group.
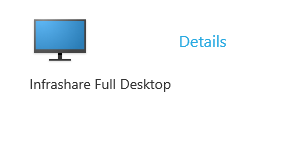
Step 82: If everything is setup correct, the earlier created Desktop must now be listed in the Desktops screen. Click on the Desktop to test the ICA connectivity
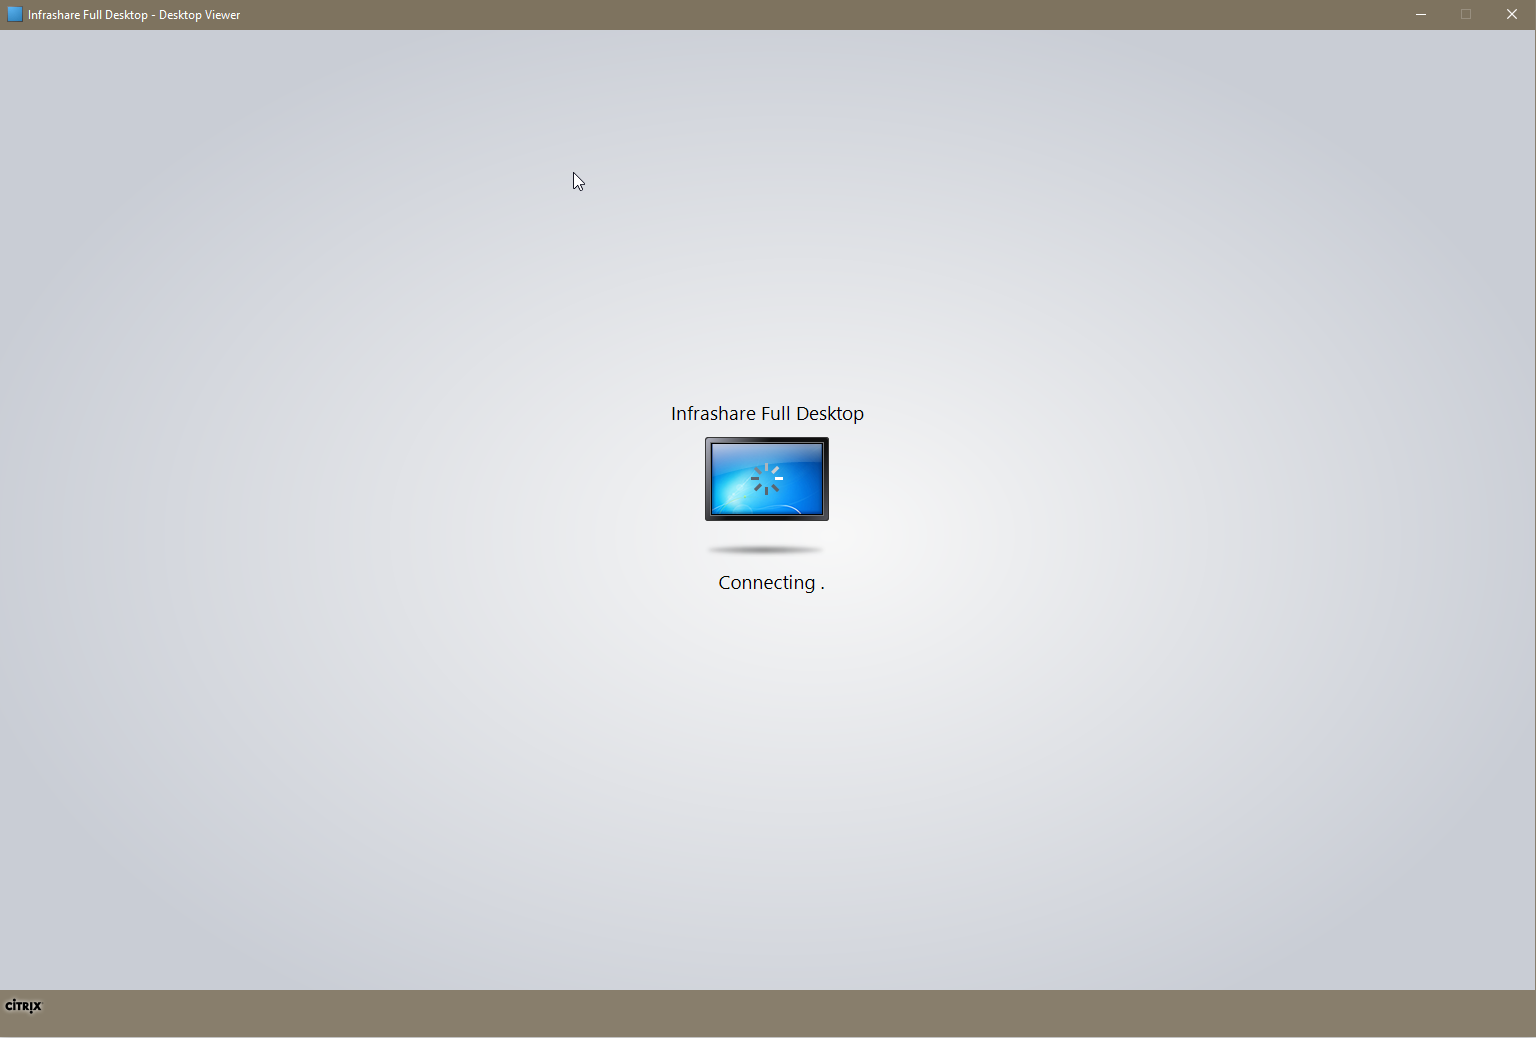
Connecting screen…
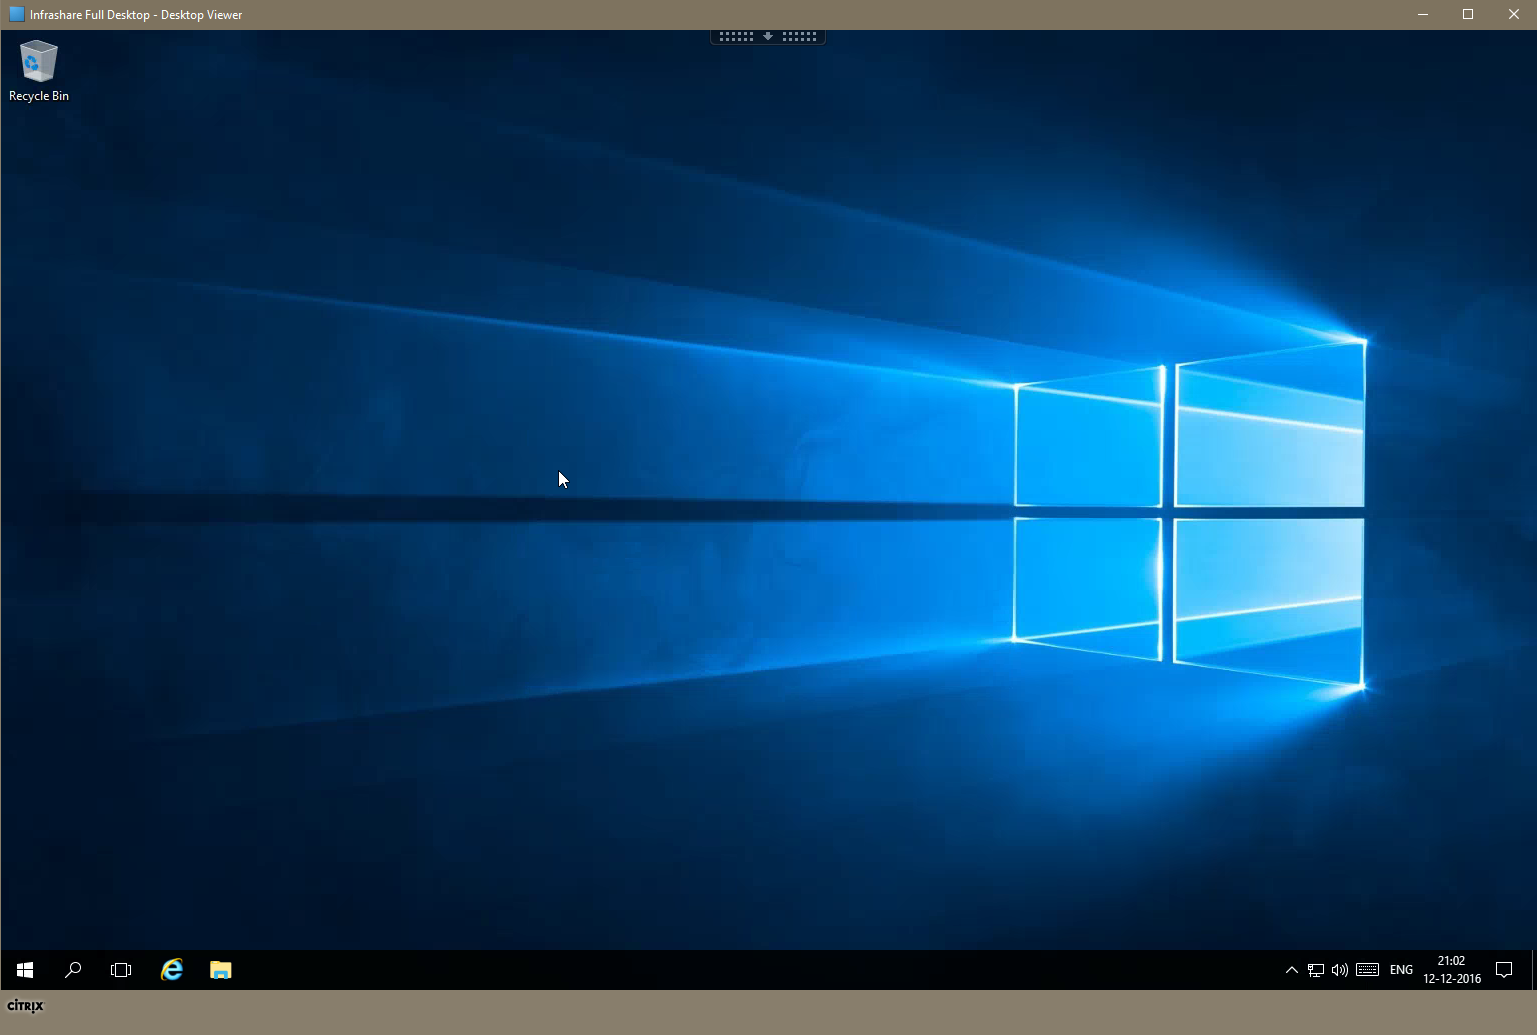
Connection is successful be established!
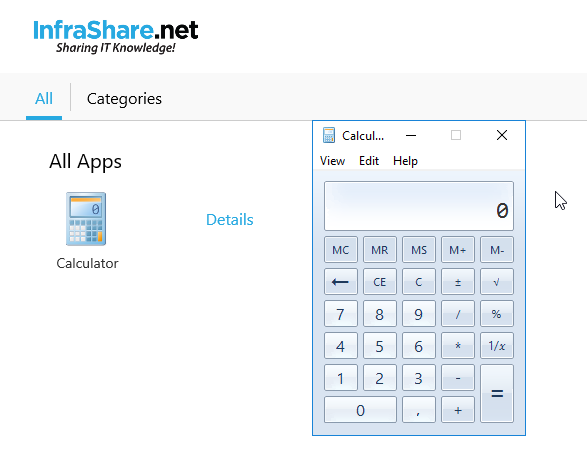
The final step: Test the Published Application, click on the Apps tab in StoreFront and click on the CalculatorApp
And the app is started successfully!

























No comments:
Post a Comment