How to install and configure StoreFront
The biggest new feature of StoreFront 3.9 is the support of the new HDX Adaptive Transport Technology. The network session transport Citrix protocol what is in full named; Enlightened Data Transport. The technology is take place over UDP what reduces the amount of data that needs to be sent over the WAN network connection what also optimizes high latency sessions, including faster performance for printing and Drive Mapping data transfers. This new technology reduces the network traffic bandwidth by up to 60%!
Also one feature update I would like to mention, in the StoreFront version 3.6, Citrix added the SAML Federated authentication support. StoreFront 3.9, the support for SAML authentication directly to StoreFront is added. It now also supports Microsoft AD FS v2.0 – v4.0 and NetScaler Gateway as identity provider.
And the last one is the new NetScaler Gateway Integration feature (NetScaler version 11.1 Build 21.51.x required). I will explain and show you this new feature procedure at the end of this blog!

All the new features:
Support for Adaptive Transport for HDX (Citrix 7.13 / NetScaler 11.1-51.21 required)
SAML Authentication to StoreFront
NetScaler Gateway Integration
Customer Experience Improvement Program (CEIP)
Requirements:
DNS A record pointed to your StoreFront server – like example storefront.infrashare.net
Pre-installed Virtual Machine, with at least Windows server 2008 r2 (I used Server 2016)
Minimum 1 vCPU (4 vCPU recommended) – 2 GB ram (4GB recommended)
Install the StoreFront software
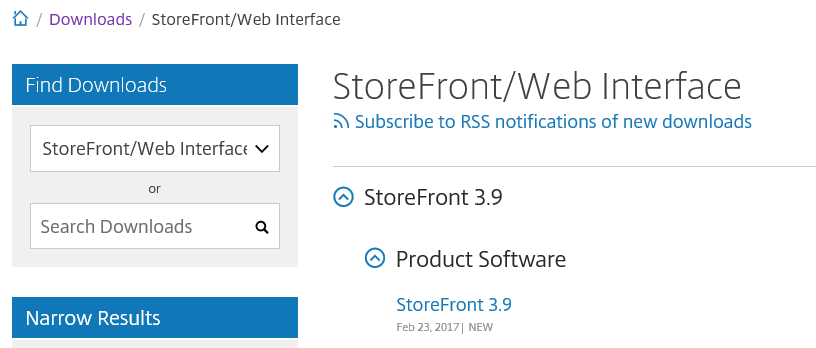
Step 1: First we need to download the StoreFront 3.9 installer software from the MyCitrix website / request a trial for XenDesktop/XenApp for lab usage here
Search for StoreFront/Web Interface in the download section or use this url
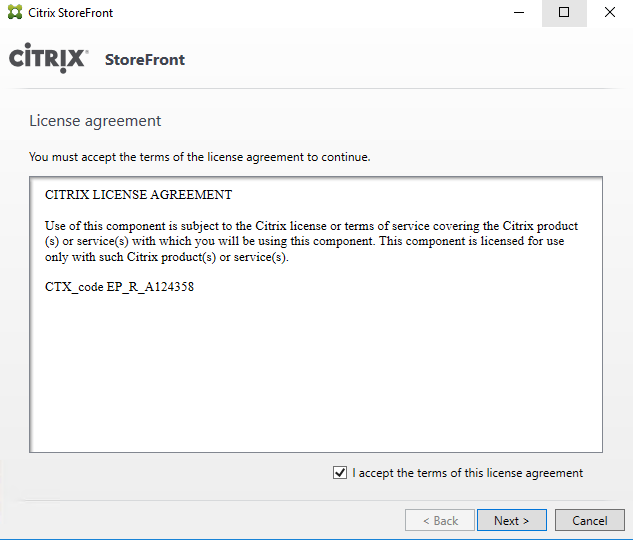
Step 2: Start the CitrixStoreFront-x64.exe installer – accept the terms of the license agreements and click on next
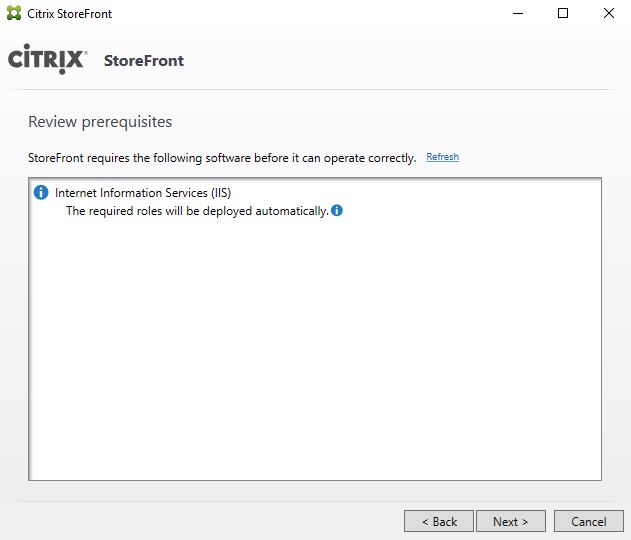
Step 3: The pre-requisites screen – IIS will be deployed first – Click on Next
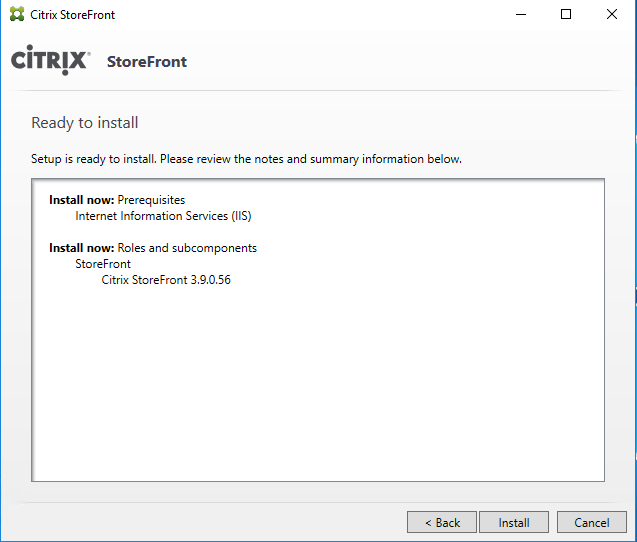
Step 4: Confirm the information and click on Install
IIS is being installed first…
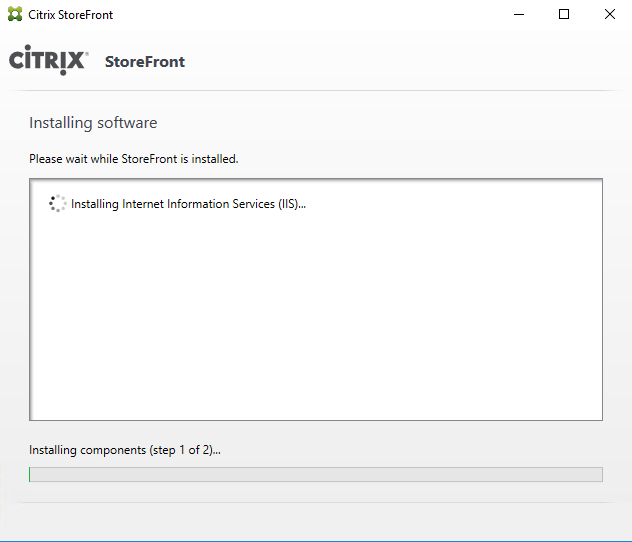
Step 5: The installation is finished, click on Finish

Step 6: Start the StoreFront console from the Start Menu

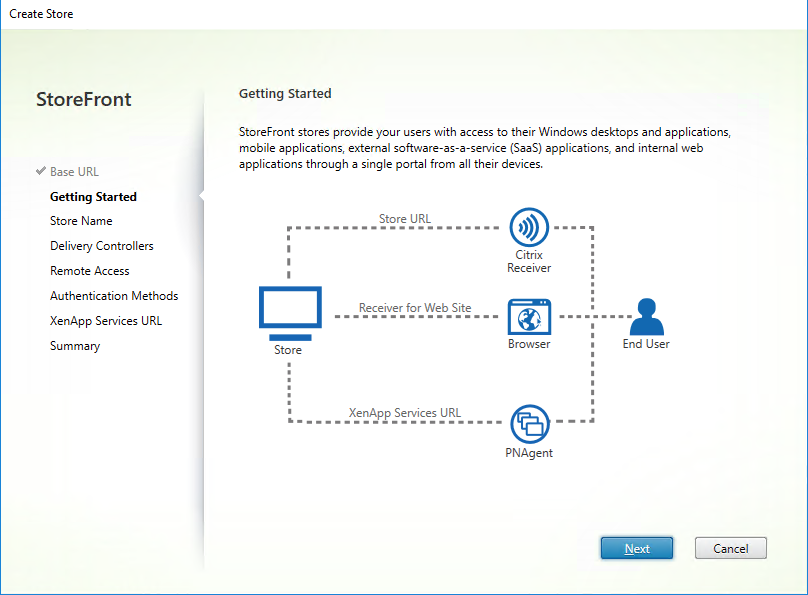
Step 7: Choose for the option – Create a new deployment

Step 8: Enter the DNS name that you created as pre-requirement – enter the protocol http or https – I will use https://storefront.infrashare.net/ – click on next
To use HTTPS –you first need to request/create an internal web certificate on the internal RootCA, the DNS record must be added as common name. Bind the certificate afterwards in the IIS Console – Default Web Site option. Then add an binding on port 443 with the new certificate.
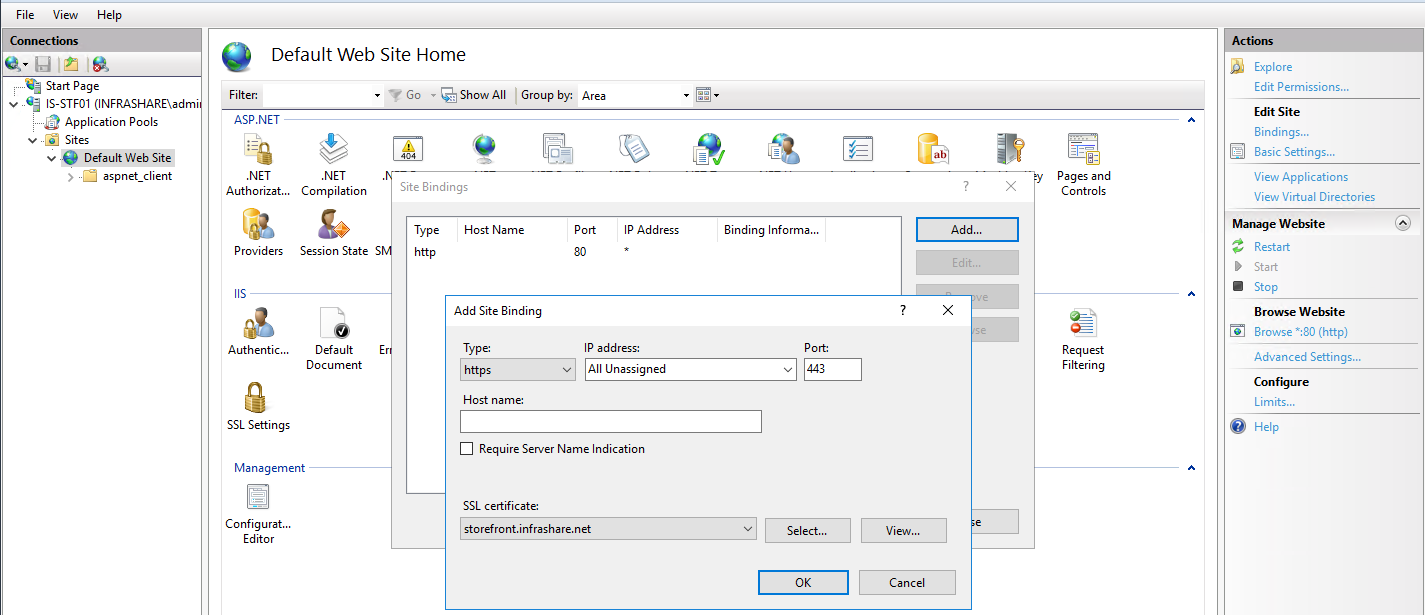
To use HTTP – If you choose for HTTP, just simply use http as base URL and your fine.

The IIS – Citrix directory is being created…

Step 9: In the wizard screen – click on next
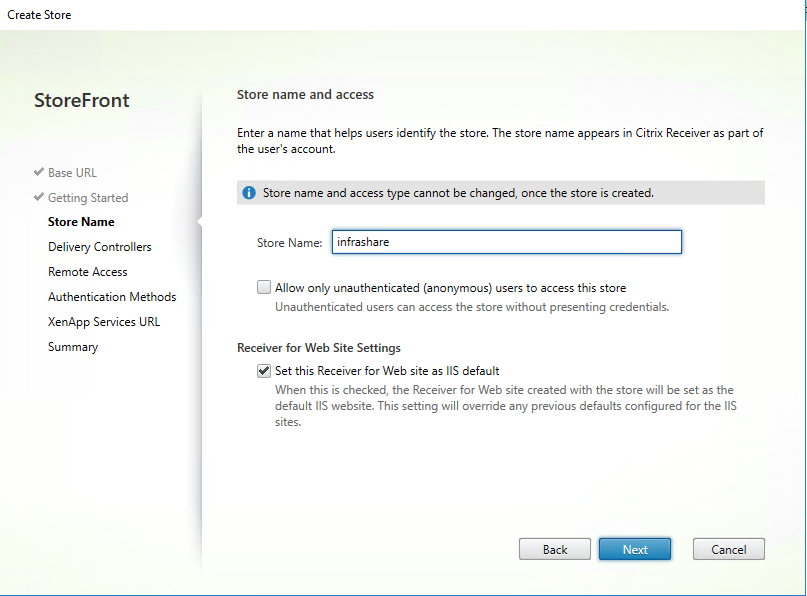
Step 10: Enter a Store name – select the option – Set this Receiver for Web site as IIS default – to point the url directly to your web directory. Click on next
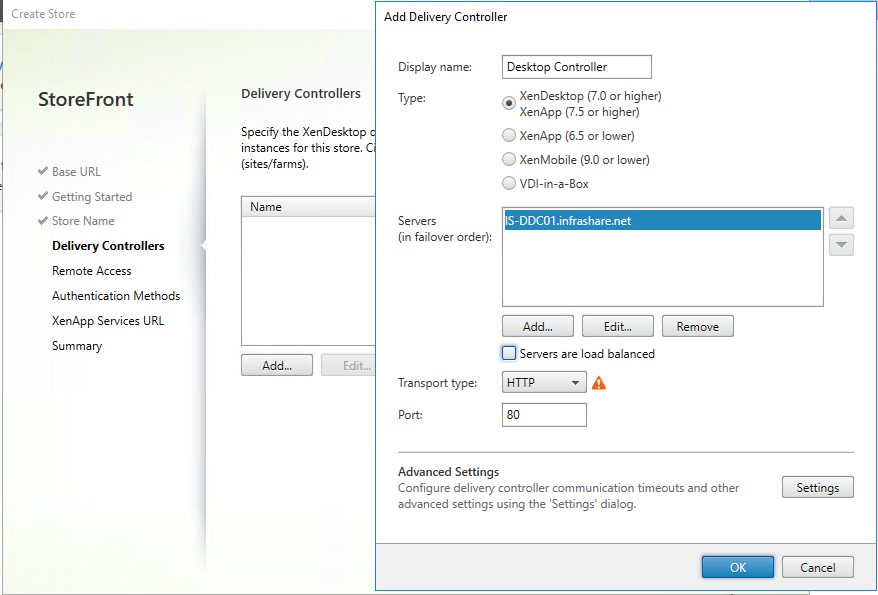
Add the Delivery Controller
Step 11: Click on the Add button and add your Desktop Controllers FQDN to the server list. Change the transport type to HTTPS when your Desktop Controllers are accepting 443 requests. Click on Ok and Next
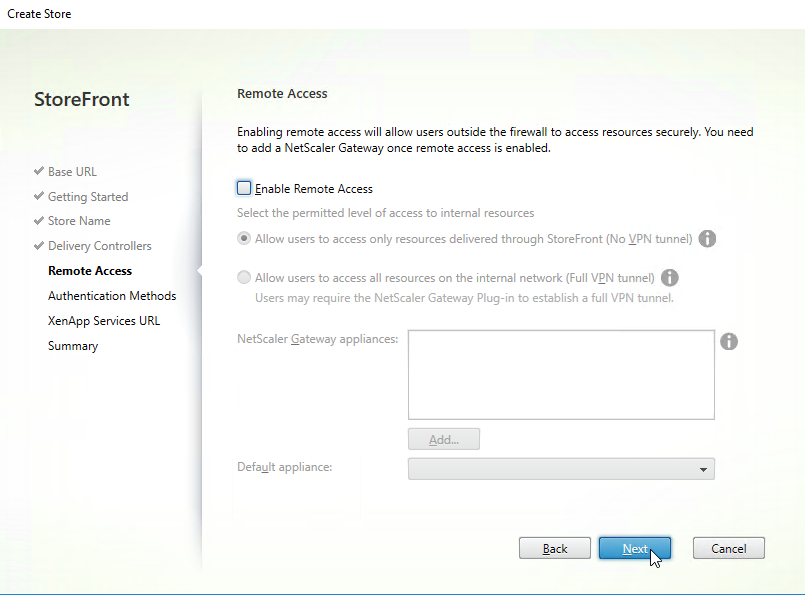
Step 12: Skip these step, by clicking on next – we are doing this later by using the new integration option
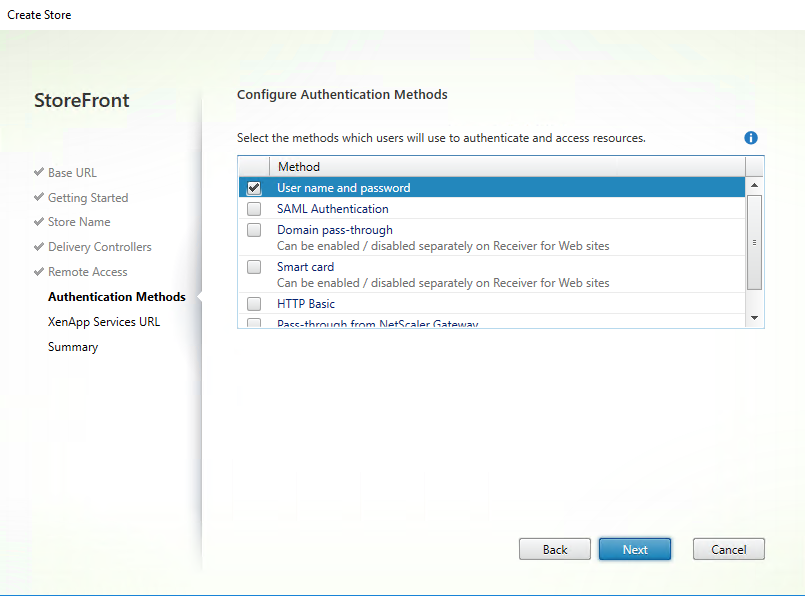
Step 13: This can be left of – username and password – click on next
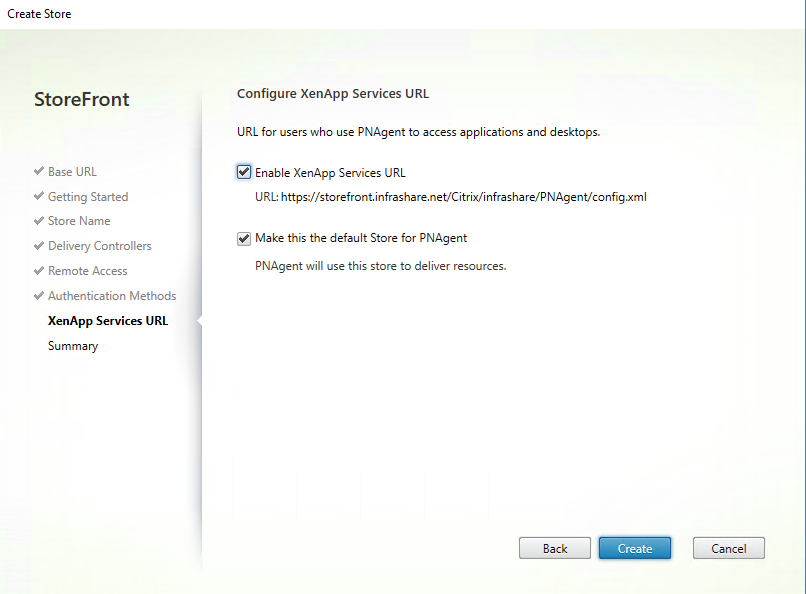
Step 14: Activate the PNagent – XenApp services url for the Citrix Receiver software configuration. Click on create to start the configuration process
The store is being created…

The installation done, click on Test Site to get redirected to the web page

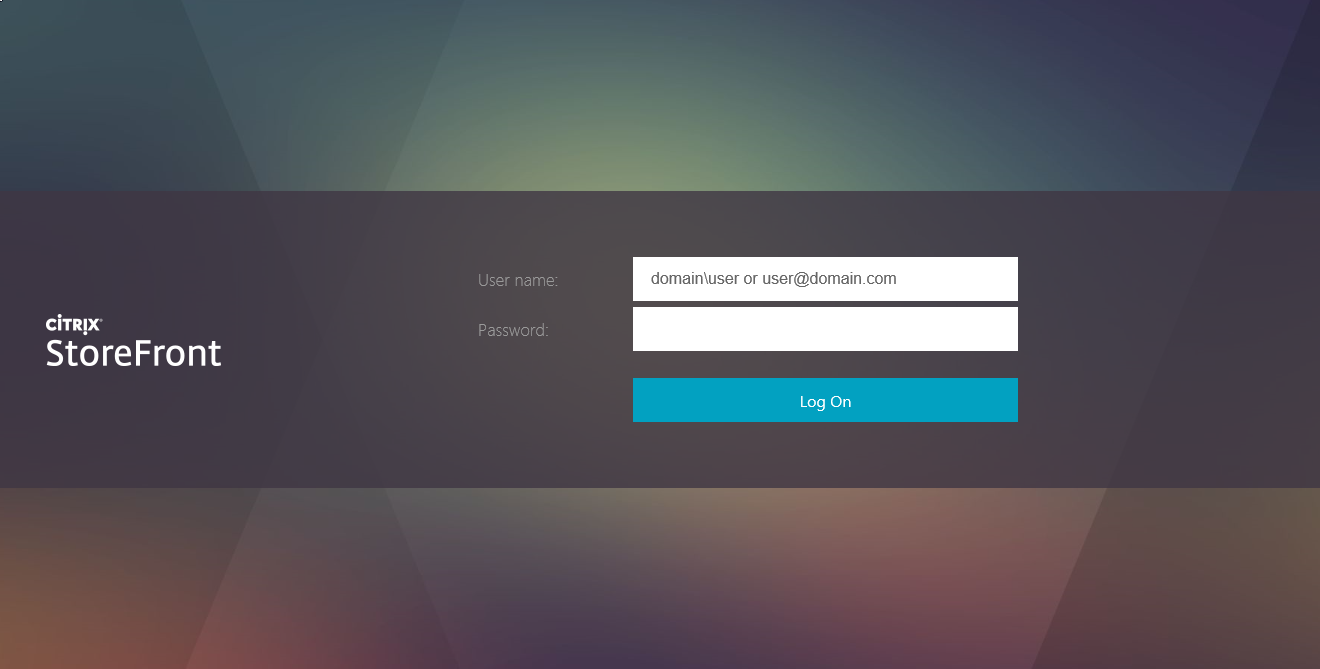
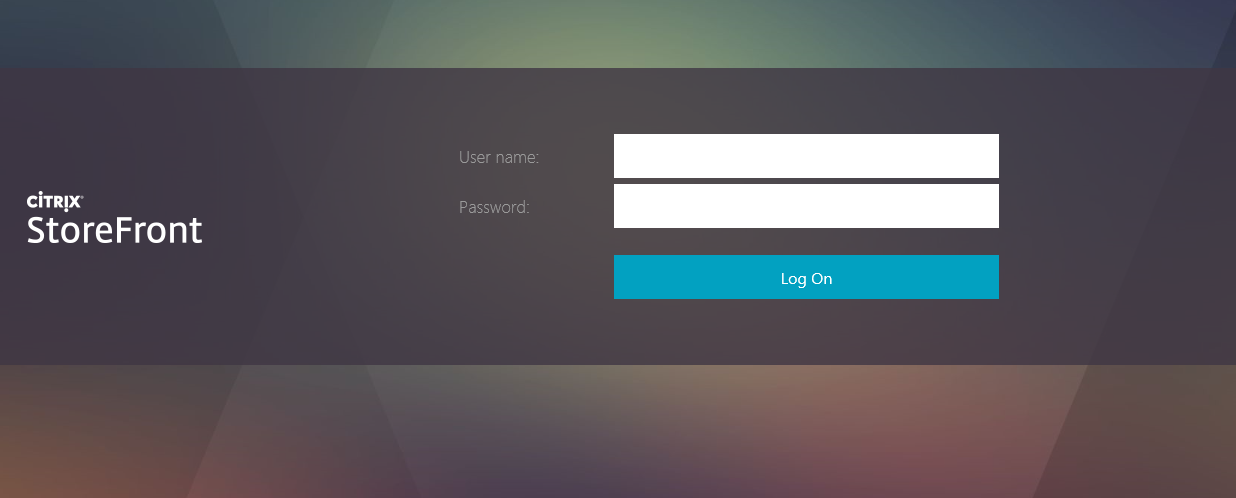
The StoreFront webpage
Change the default logon domain
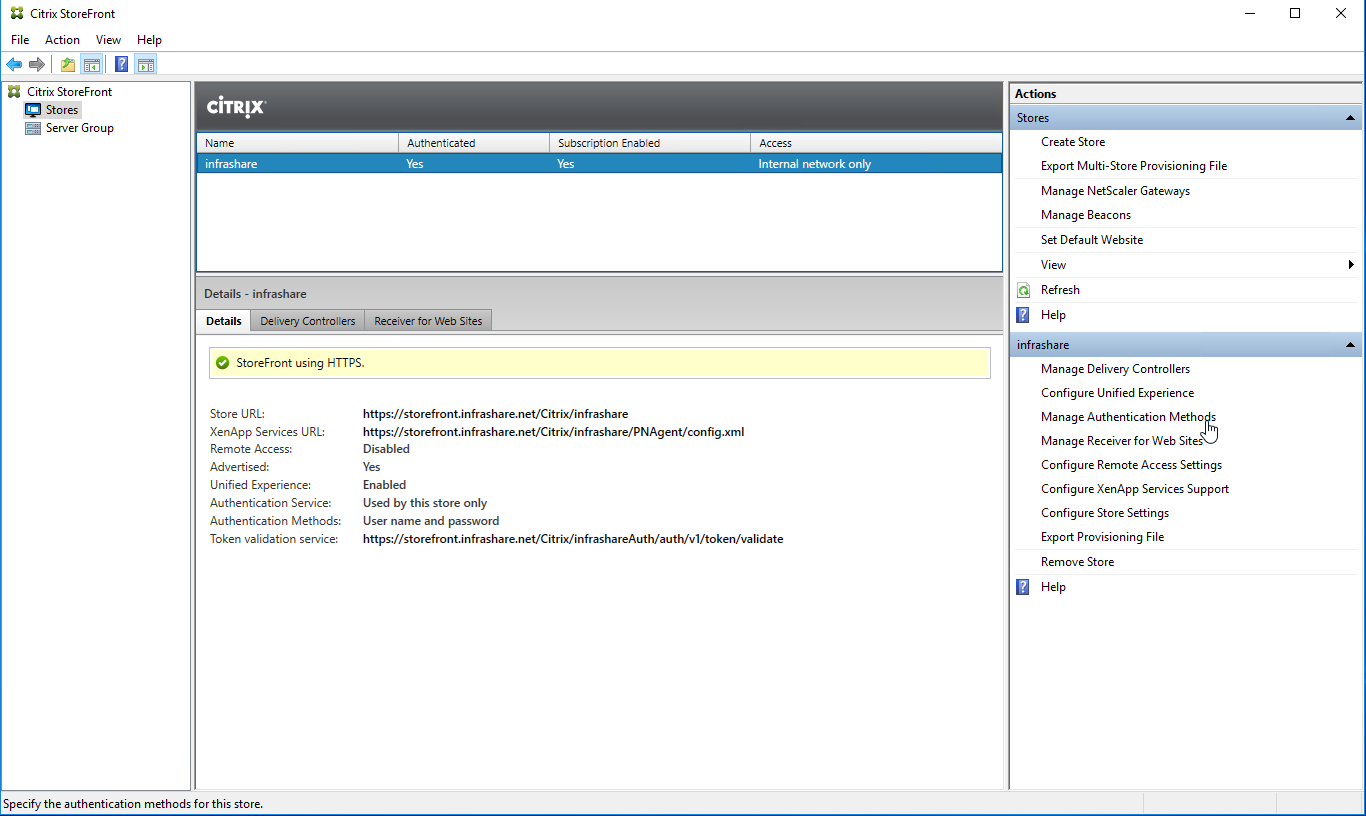
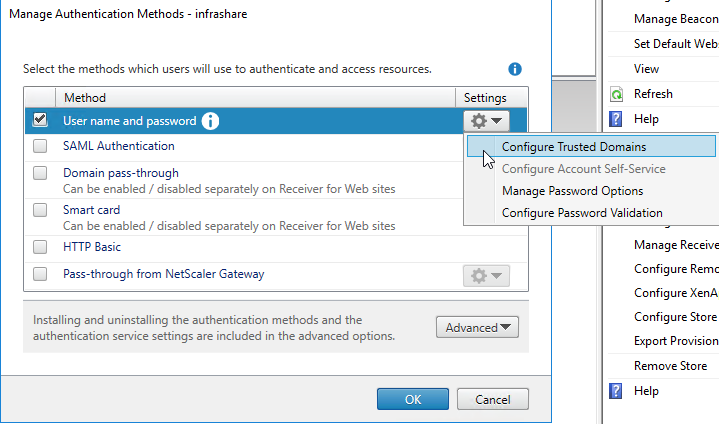
Step 15: Open the StoreFront Console – open the stores menu – click on the – manage Authentication Methods – option
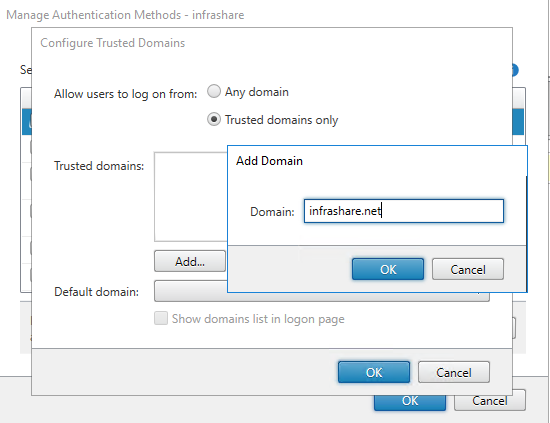
Step 16: Choose for the option – Configure Trusted Domains
Step 17: Click on the Add button – add your domain and click 3 times on the Ok button to save the setting
Refresh your StoreFront page – the domain is not required anymore – you now can logon by username and password only!
Edit the default Logo and Header
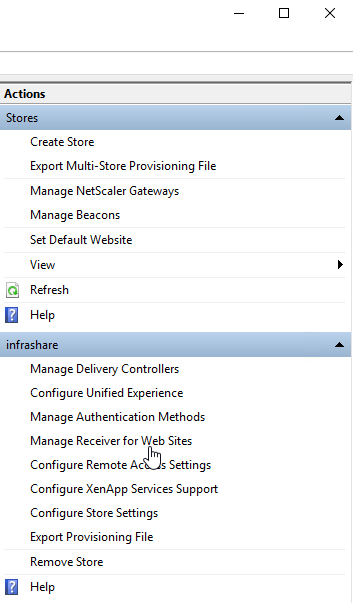
Step 19: Open the – Manage Receiver for Web Sites – option
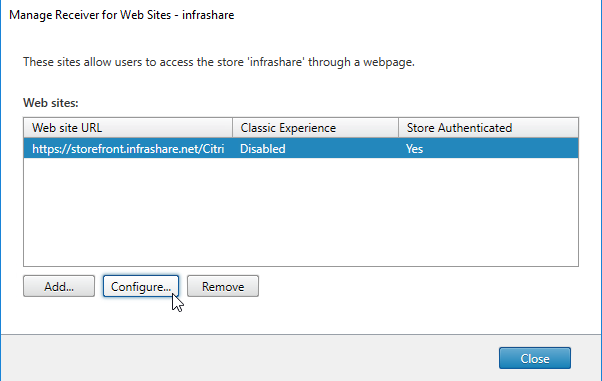
Step 20: Click on Configure
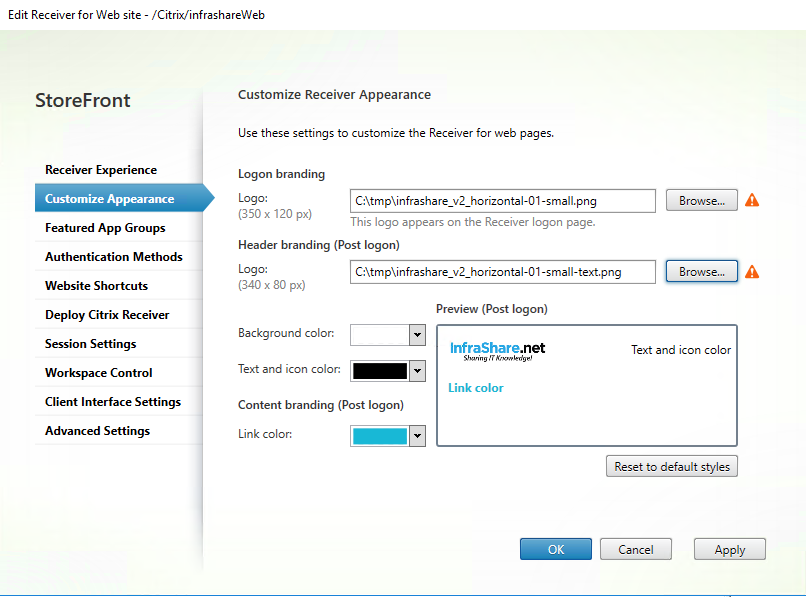
Step 21: Upload the logo that you want to place at the logon screen – the second logo will be placed in the header when logged on – change the colors that fit your needs. Click on Apply and Ok
Note: Be aware of the logo sizing, if they are bigger then the default you can get problems with your PNagent – receiver profile setup for the X1 Receiver Experience.
Refresh your StoreFront page and see the results
Post logon page

You now configured an fully functional StoreFront 3.9 for internal usage!
Perform the NetScaler Gateway integration
You first need to upgrade your NetScaler to at least 11.1 Build 52. I will use the latest version, at the moment of writing 11.1 Build 52.13.
You also need to have an active NetScaler Gateway – ICA Proxy configuration. If you haven’t got this. You can check my other blog article doing this – beginning at step 32 (skip the Azure part).
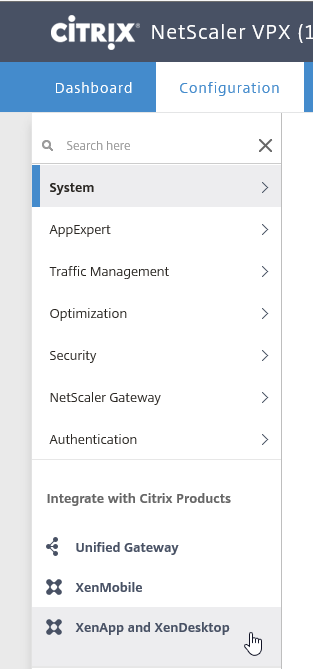
Step 22:Login to your NetScaler Device Web Portal and go to XenApp and XenDesktop
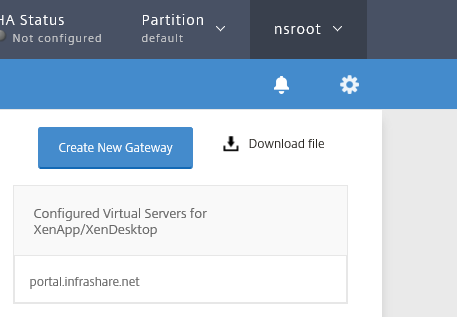
Step 23: Click on the  Download File button
Step 24: Choose – export all the virtual Servers – click ok
Note: I had some problems by doing this in IE11 and Edge. Chrome works fine for me.

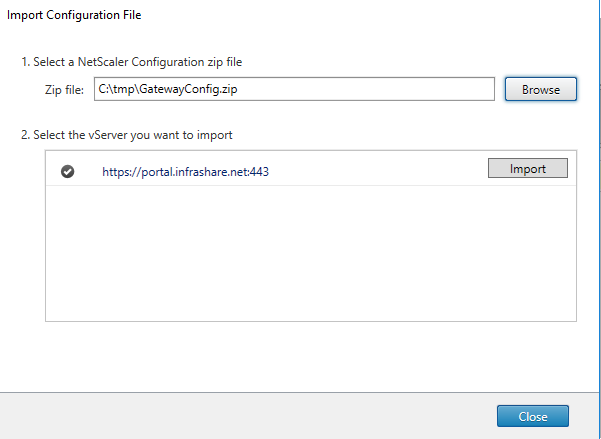
Step 25: You now will get an Download prompt for the file GatewayConfig.zip – Save this file on the C:\tmp location of your StoreFront server

Step 26: Log on to your StoreFront server and open the StoreFront Console
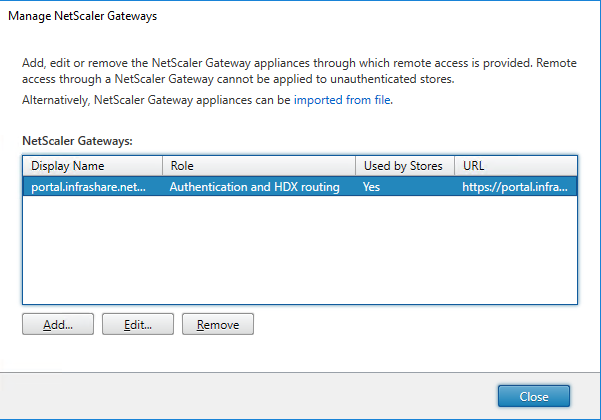
Step 27: Go to Stores and click on the Manage NetScaler Gateways option

Step 28:Click on the option – imported from file
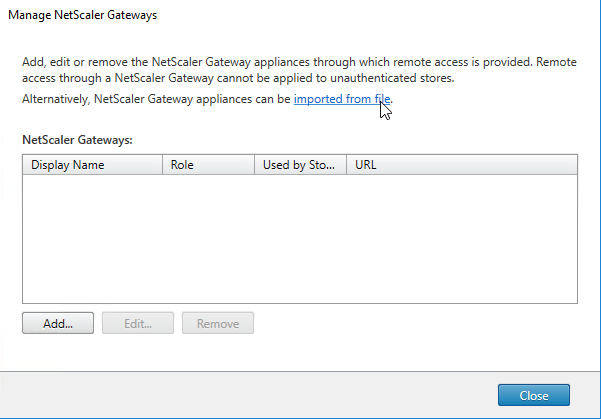
Step 29: Browse to your GatewayConfig.zip file – click on the Import button
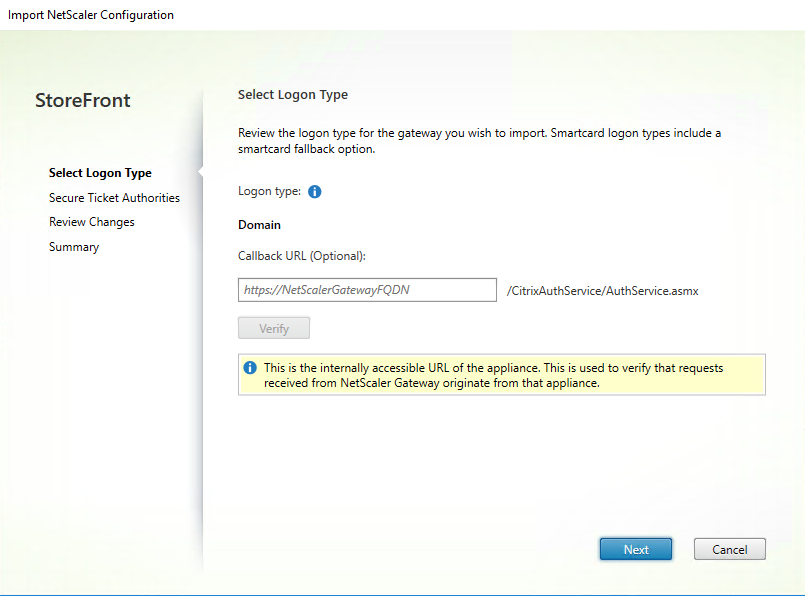
Step 30: The import NetScaler wizard starts, the callback url is not needed. click on Next
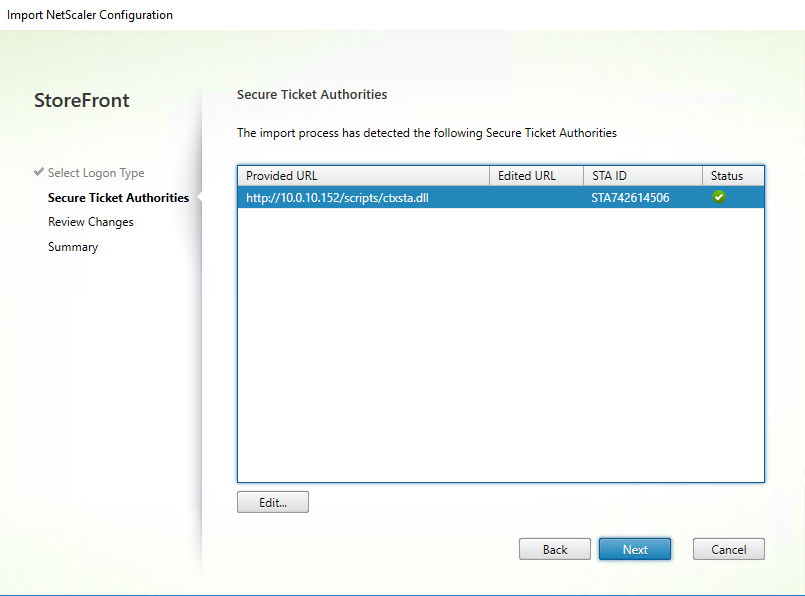
Step 31: Verify the STA server url – click on next afterwards
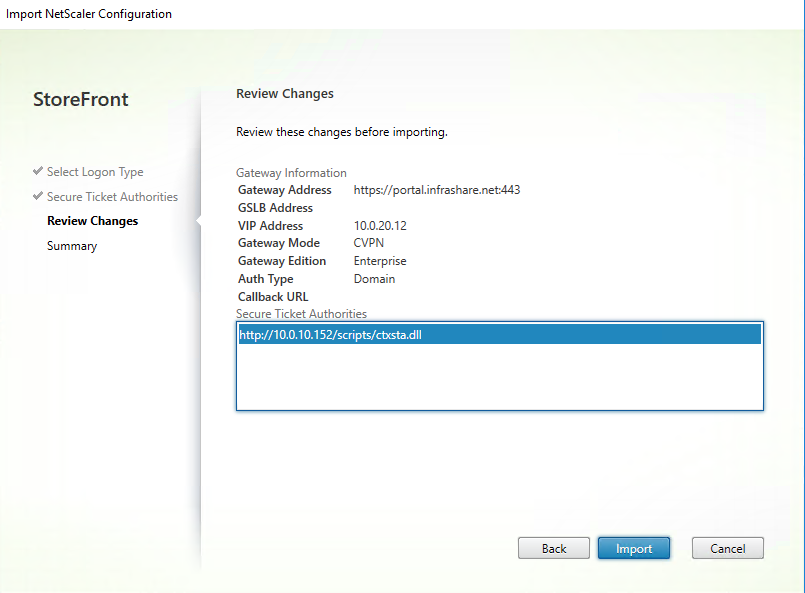
Step 31: Review all the information – click on Import
The import is completed, click on finish
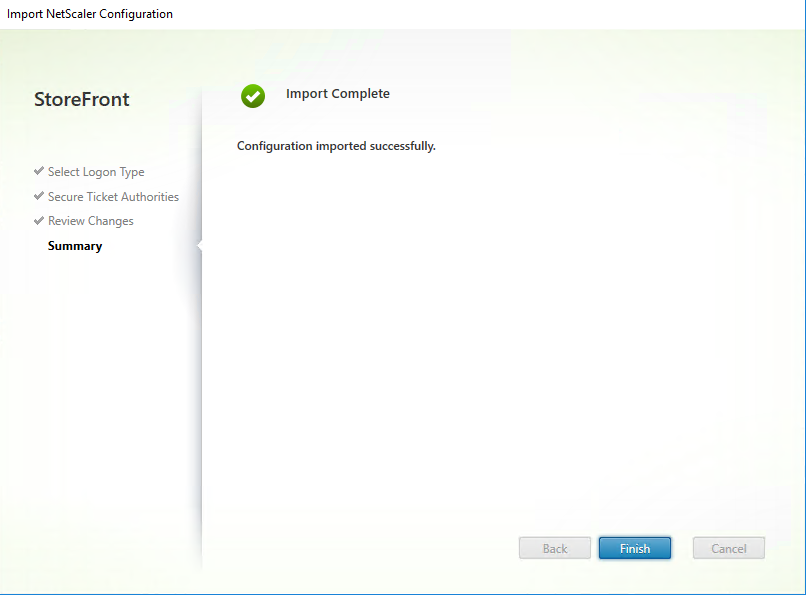
A green checkmark says that it is added successfully, when you have certain changes, you also can update the same vServer by pressing Update

The NetScaler is automatic selected as default – Used by Stores
Check the settings – open the Configure Remote Access Settings option

The just imported NetScaler is selected by default
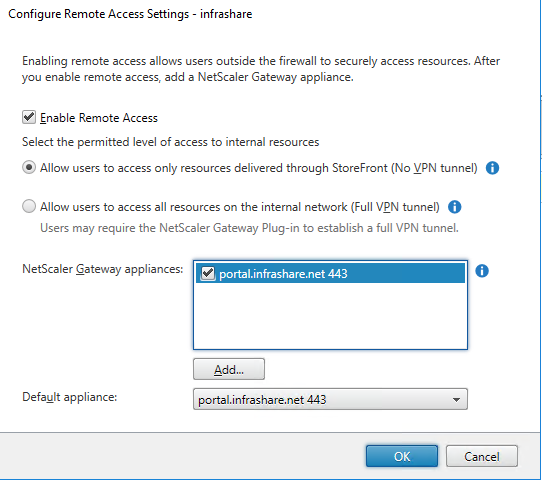
All the configuration steps are now done, and your StoreFront 3.9 server is ready for use!
No comments:
Post a Comment